VDB's volumes and Render Layers in Unreal Engine 5.4
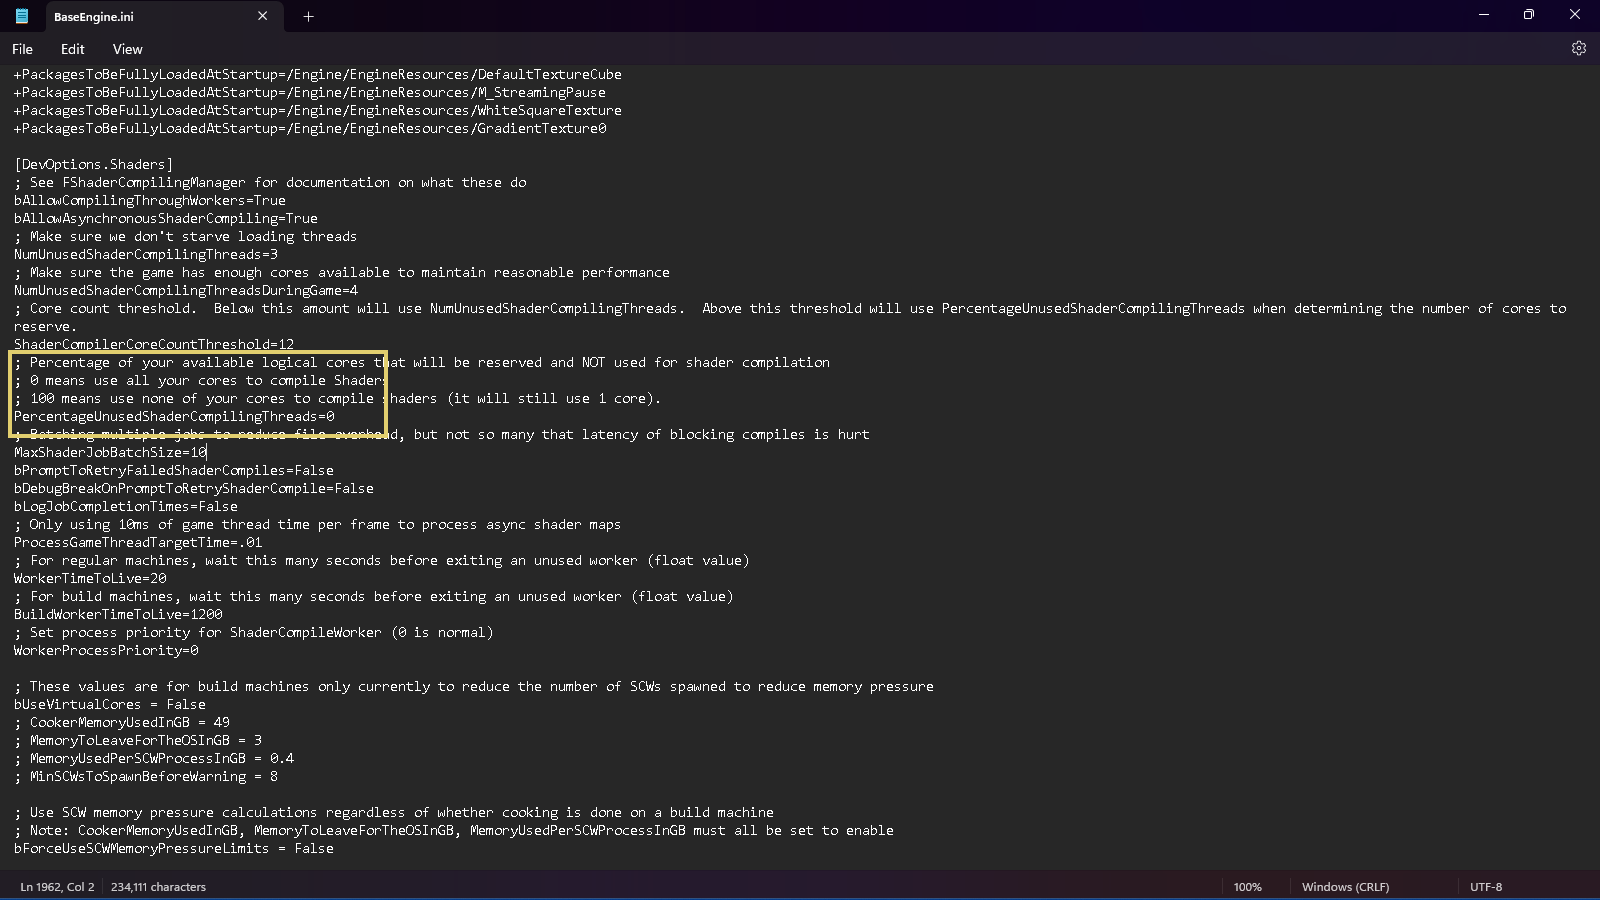
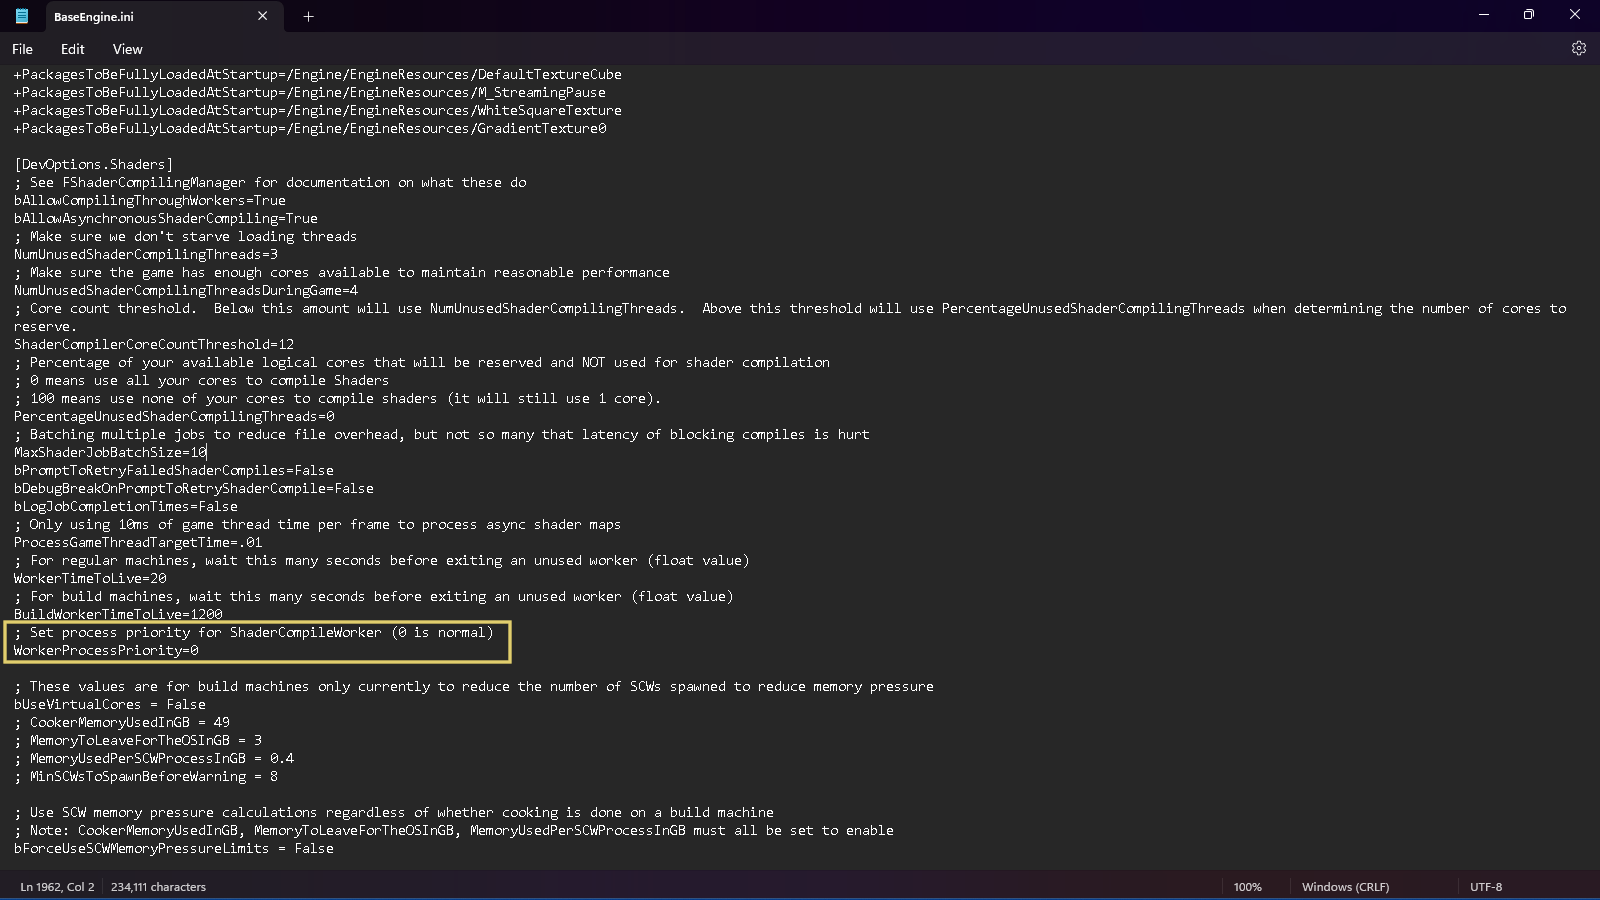
Despite the title of the tutorial, this is about a little more than vdb's and render layers. One of the most welcomed features of Unreal Engine 5.4 is how the engine now compiles shaders very fast. It's another world, mainly for those that uses a not so powerful system. Of course, the artist still can tweak the compiling process priority changing the WorkerProcessPriority variable to 0, on the BaseEngine.ini file. Also, to change the PercentageUnusedShaderCompilingThreads variable to 0, is a known way to speed up the shading compiling in Unreal Engine. But, what we have now, is really a very fast shading compiling right from the get-go.
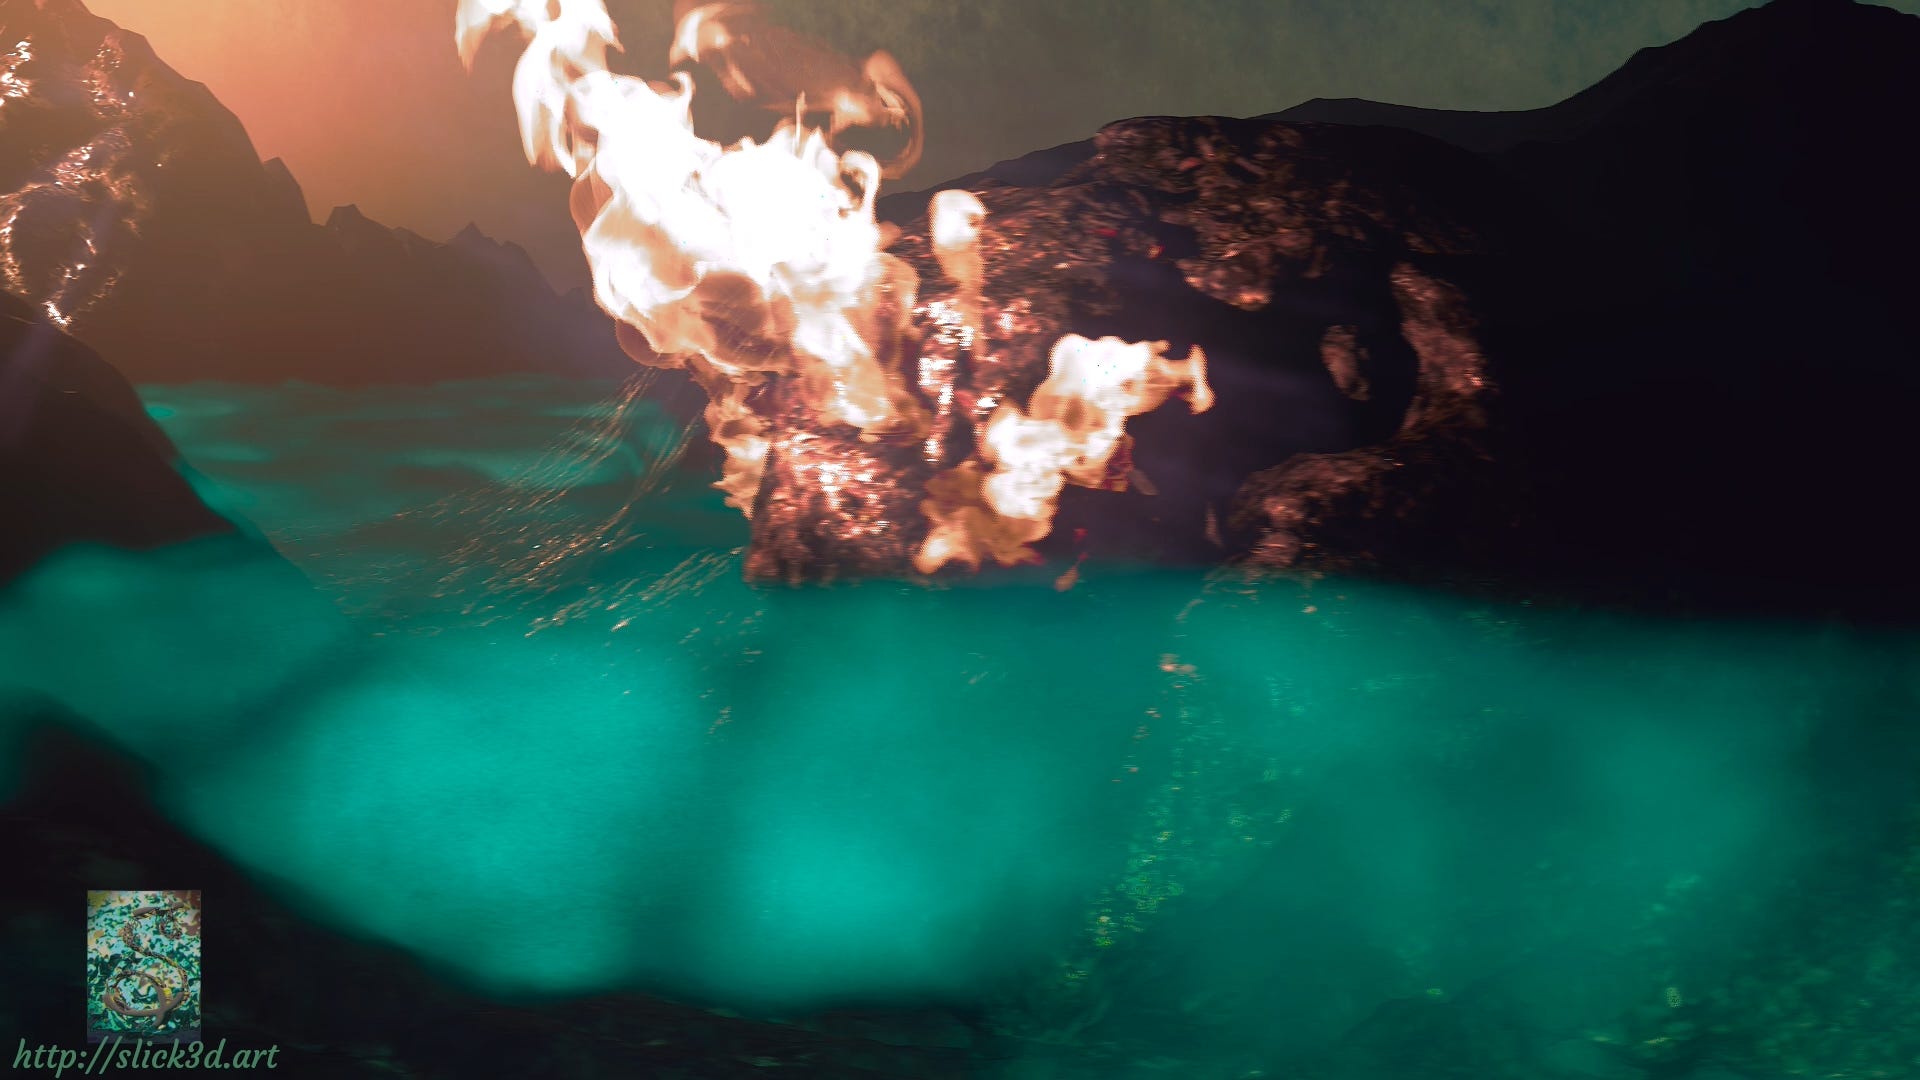
On the render above, it's seen that the project uses two heterogeneous volumes, one for the fire and another too the mist effect. First of all, this project uses the new shading system Substrate, though the shading network is not really so different from the Unreal standard material. What can be a challenging is to import the openvdb simulation correctly. On this project, both sims were done in Houdini. It's necessary to scale the simulation by 100 to get it with the right size in Unreal. Then, I used a transform node to scale it by 100.
Also, the velocity information was deleted. It appears that vdb's with velocity information crash Unreal. I had this issue all the time. Then, the solution was to delete the velocity information before cache it.
The rotation needs to be (90, 0, 0), and the scale (1, -1, 1) which flips the Y-axis and making the volume appears in the right position inside Unreal.
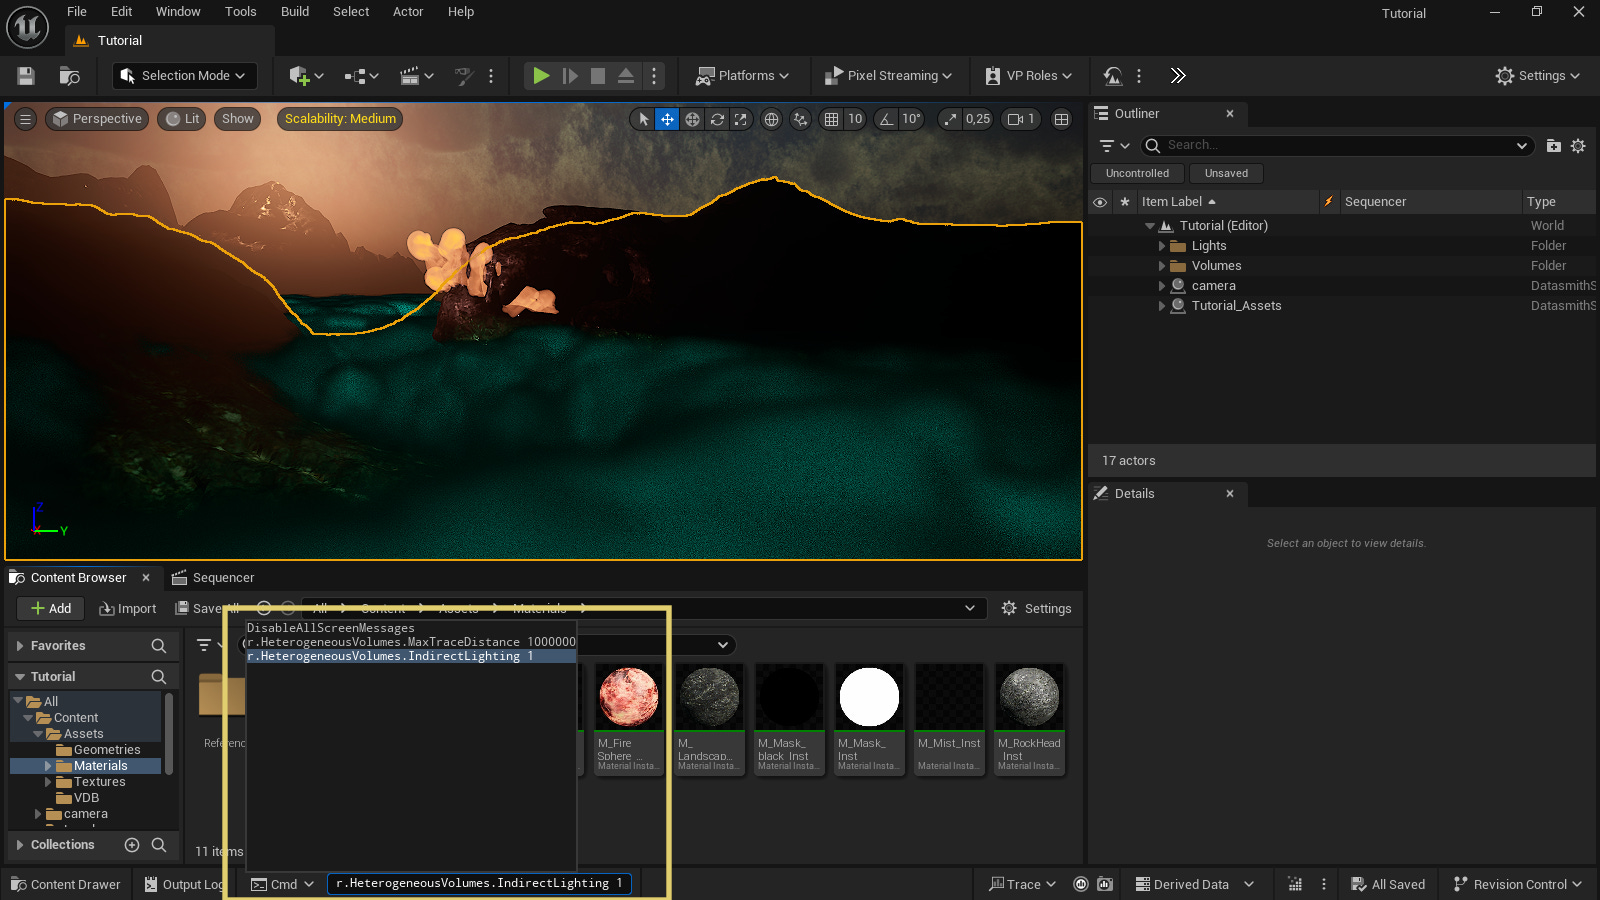
But, there's more: The artist must set r.HeterogeneousVolumes.MaxTraceDistance 1000000 or to a higher number to be able to see the volume in the viewport, what is very true for am openvdb with a very large bounding box at least. Also, r.HeterogeneousVolumes.IndirectLighting 1 to enable the volume indirect lighting.
The fire shader was created using a standard approach, but I'll try some different setups in the future, something like what I did for the mist shader. Anyway, for any volume shader, the beginning is the same: it's necessary to define the bounding box of the volume for Unreal be able to do the correct shader computation. For this, a Local Position node subtracts the min value from an Object Local Bounds node. The result is divided by the extends parameter of the Object Local Bounds node. This math operation gives the uvs to be used by the Sparse Volume Texture node, which uses the openvdb file.
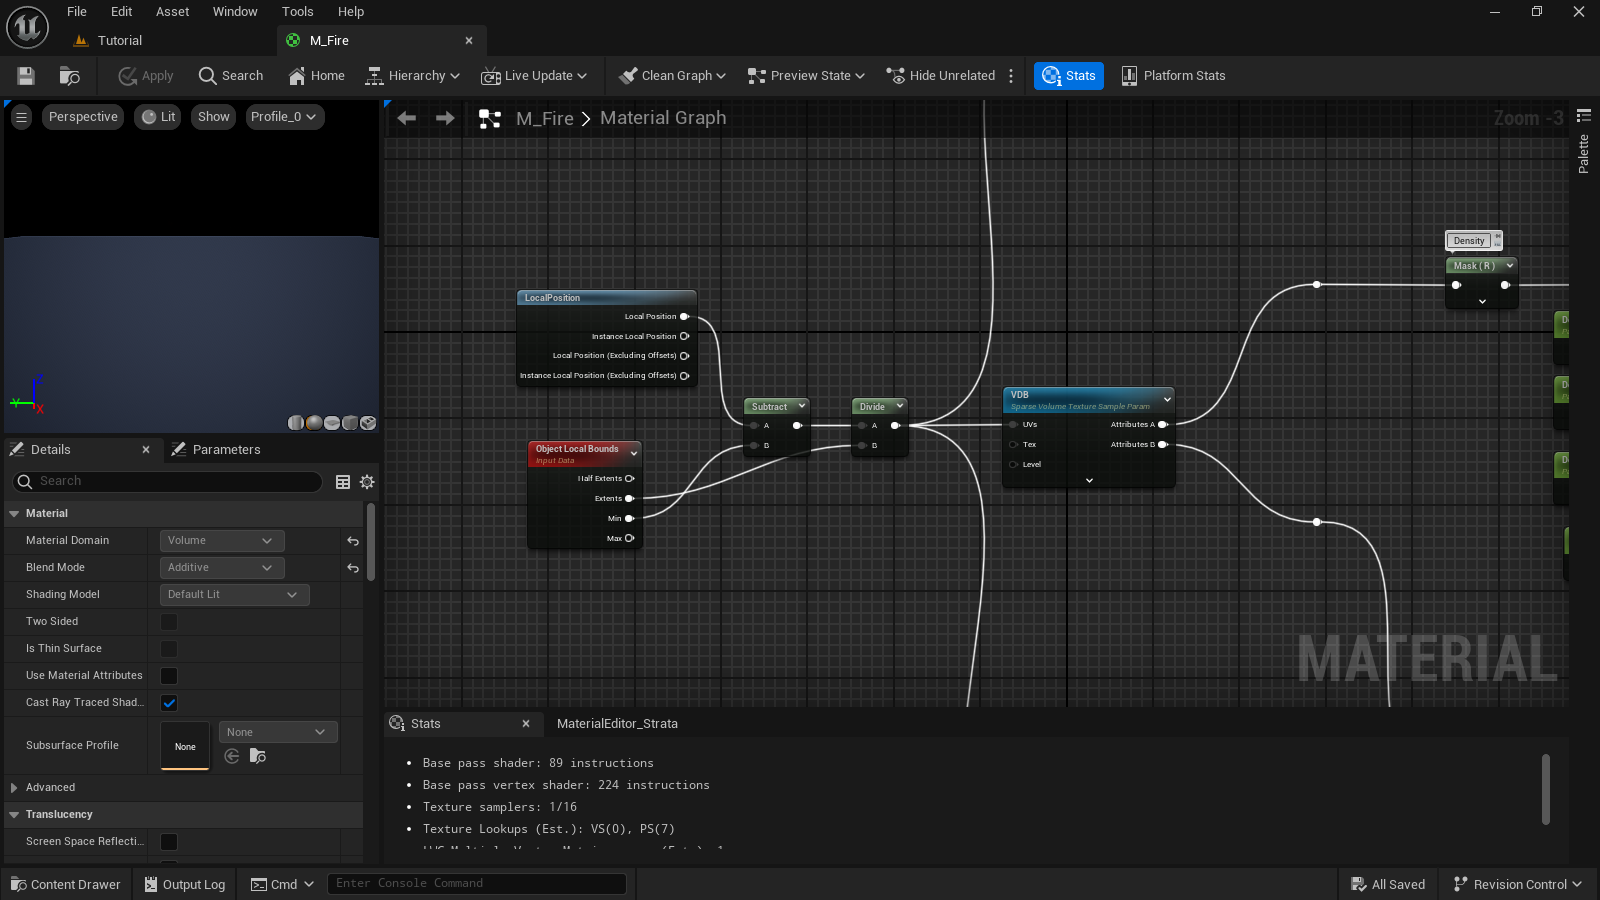
The Local Position node represents the position of a point within the volume in local coordinates, meaning its position relative to the volume's origin. Object Local Bounds provides information about the bounding box of the object containing the volume. The subtraction operation gives the position of the point relative to the minimum corner of the bounding box. This operation effectively centers the coordinates around the minimum corner of the bounding box. The divide operation normalizes the coordinates to the range [-1, 1].
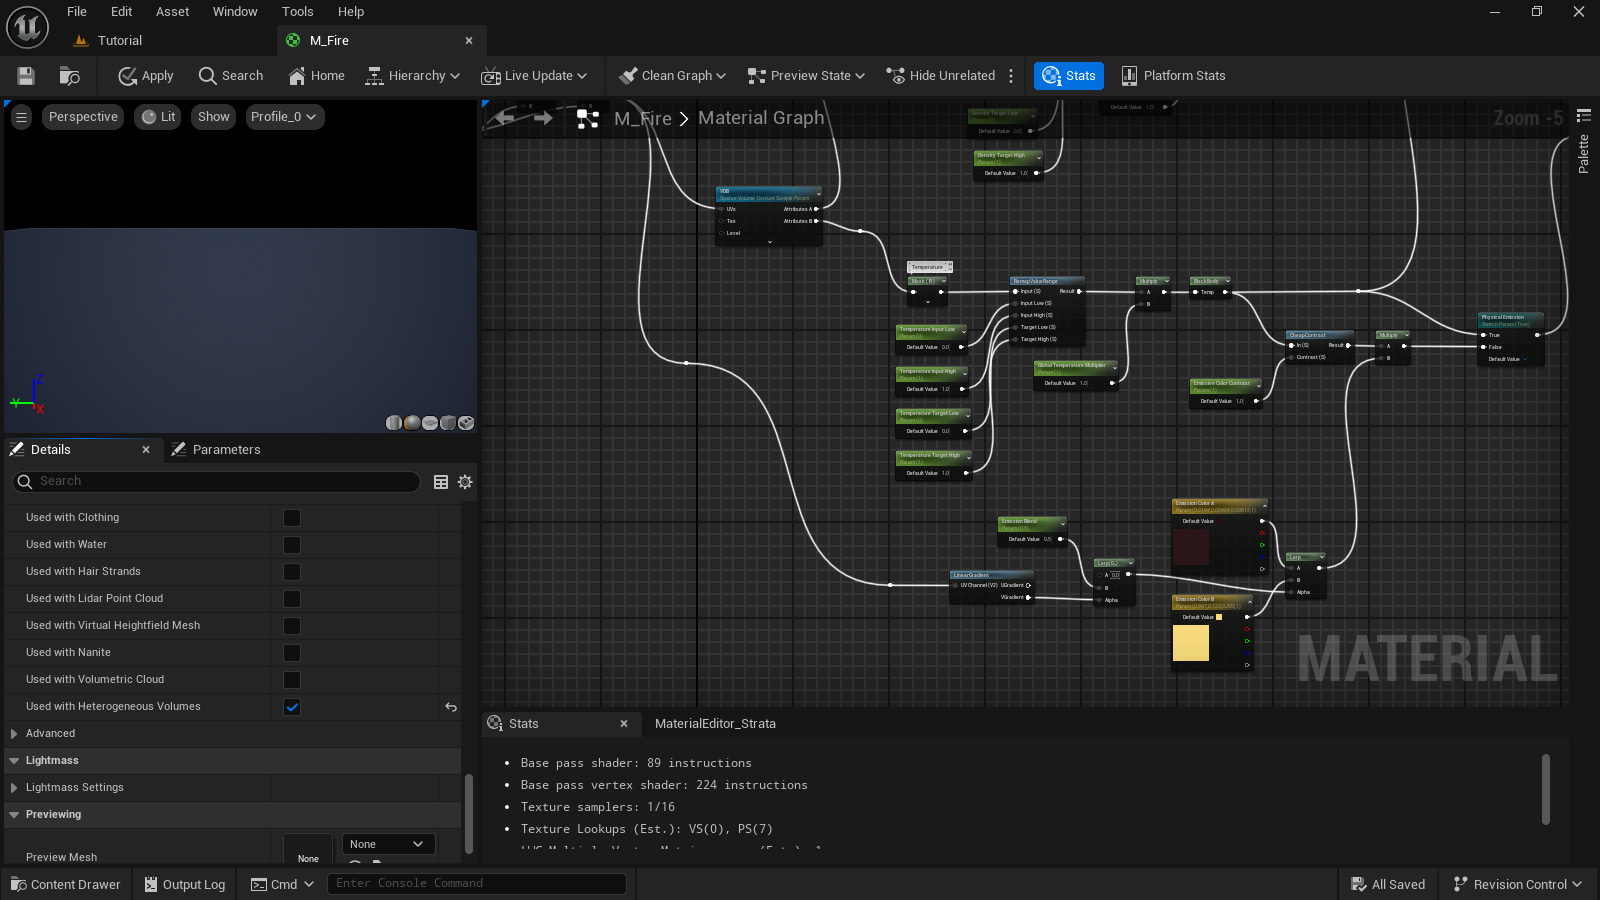
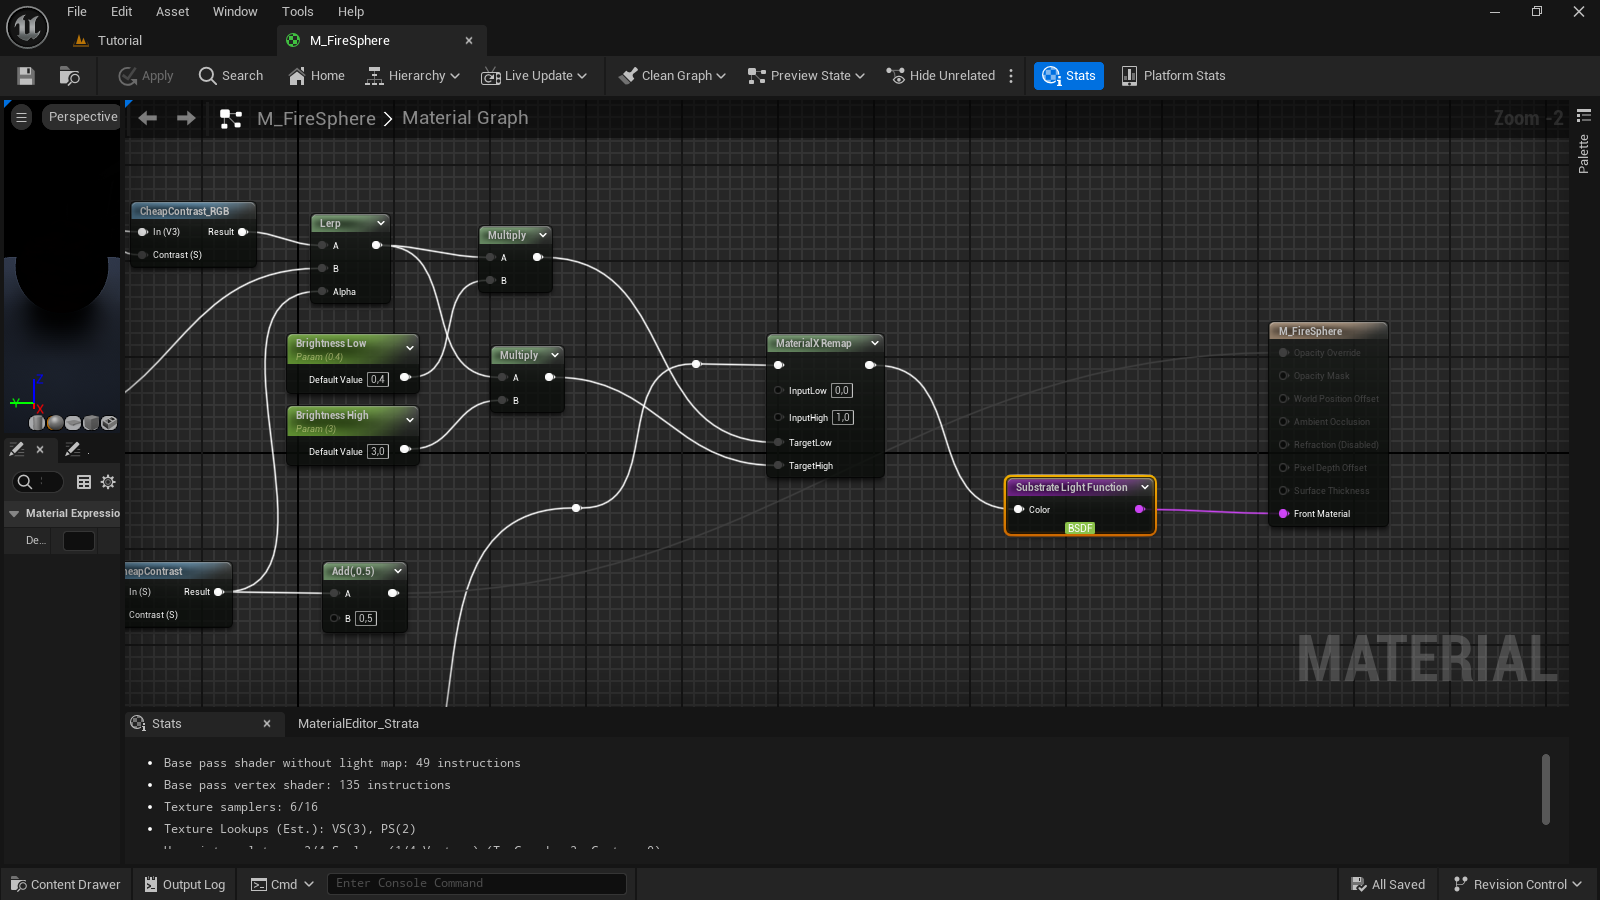
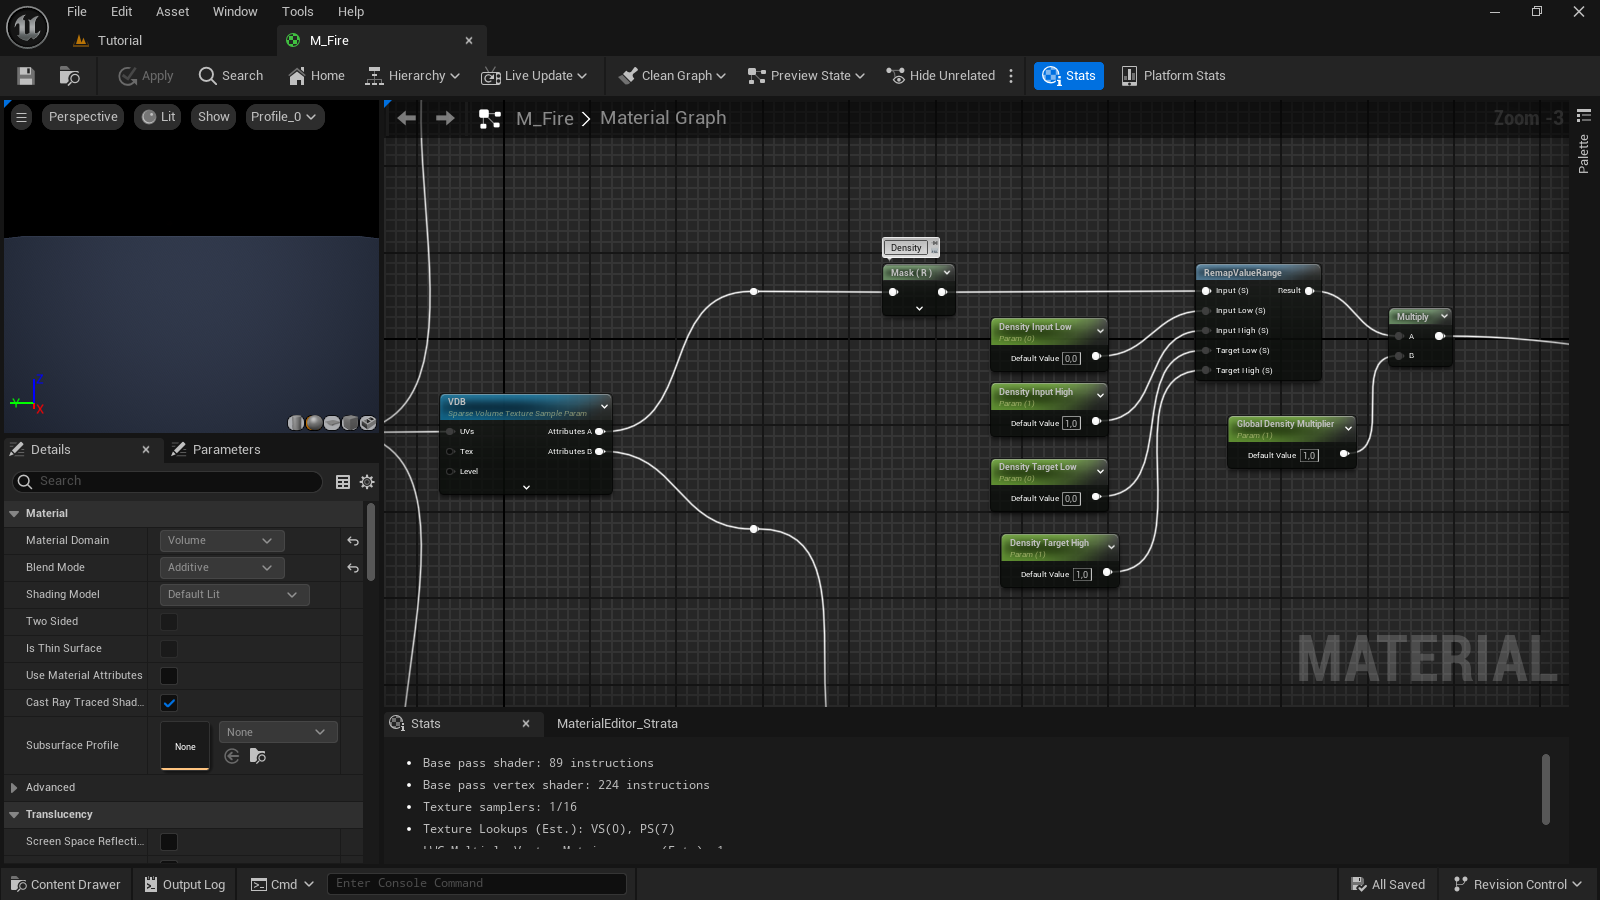
On this project, the fire simulation was imported with density at the R channel of the attributes A, and temperature information at the R channel of the attributes B. Then, after isolate the R channel on both attributes, it was used Remap Value Range node to allow the artist remap the values, standard stuff.
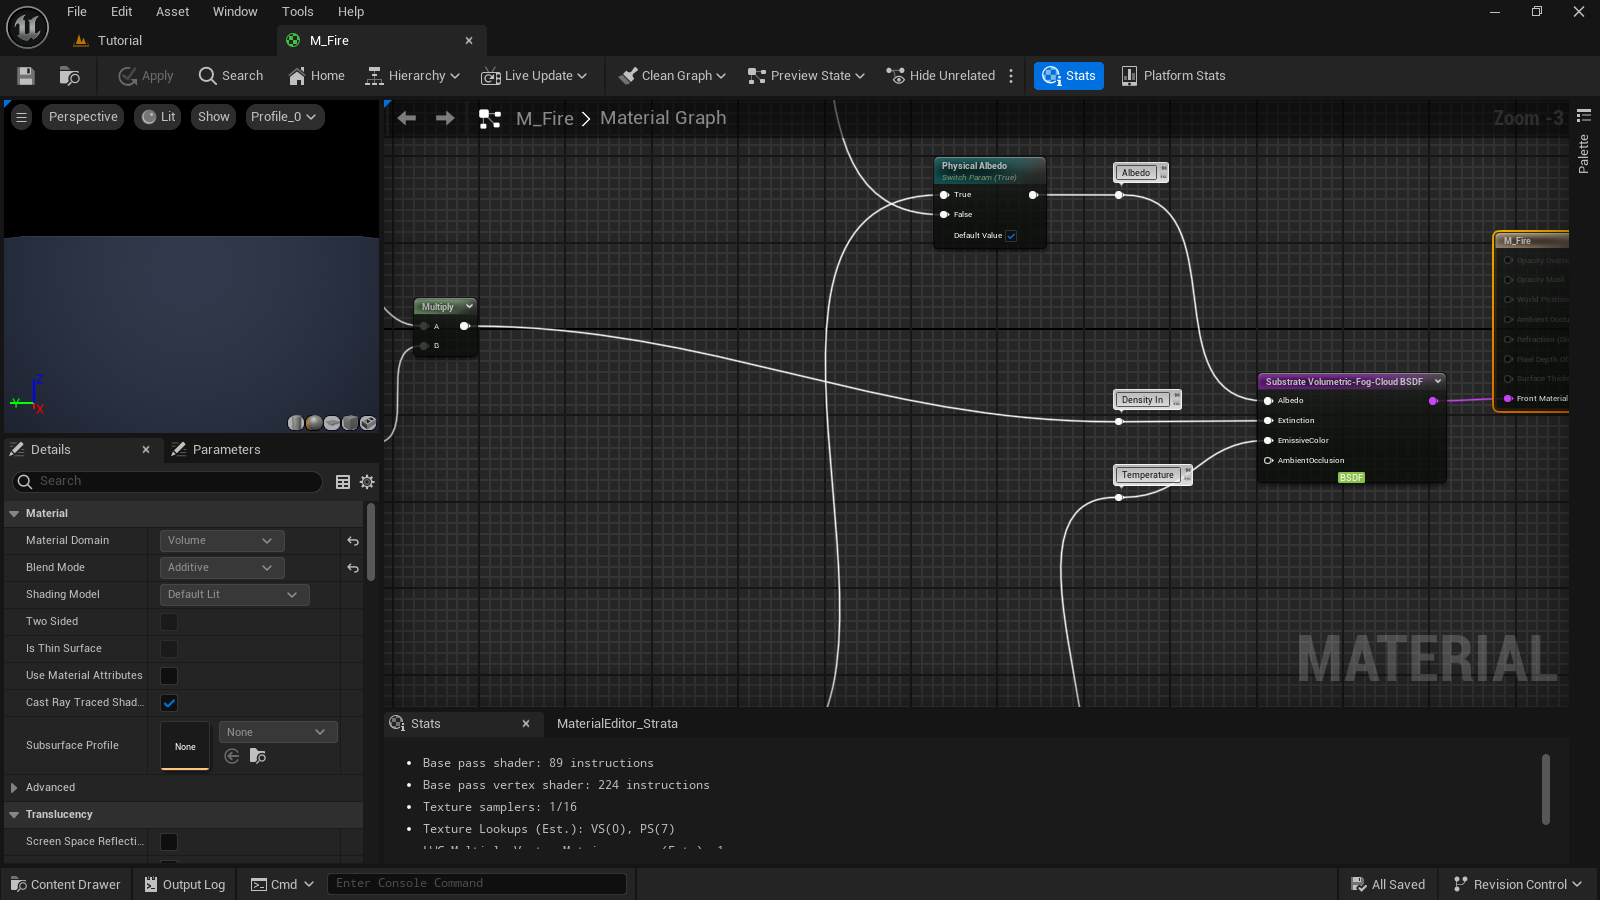
To do the shading of a heterogeneous volume with substrate, the Substrate Volumetric-Fog-Cloud BSDF should be used. The density information is connected to the Extinction slot, the temperature information to the EmissiveColor slot, the color information is connected to the Albedo slot.
For the temperature or emission was used a blackbody node to do a real life physical shading. However, in my experience so far, taking an artistic approach gave me better results. The Physical Emission node is a Switch node parameter that allows the artist to switch between a physical emission approach and an artistic approach. The difference is that the artistic approach uses two colors to create an gradient, the physical approach uses the value of the blackbody node.
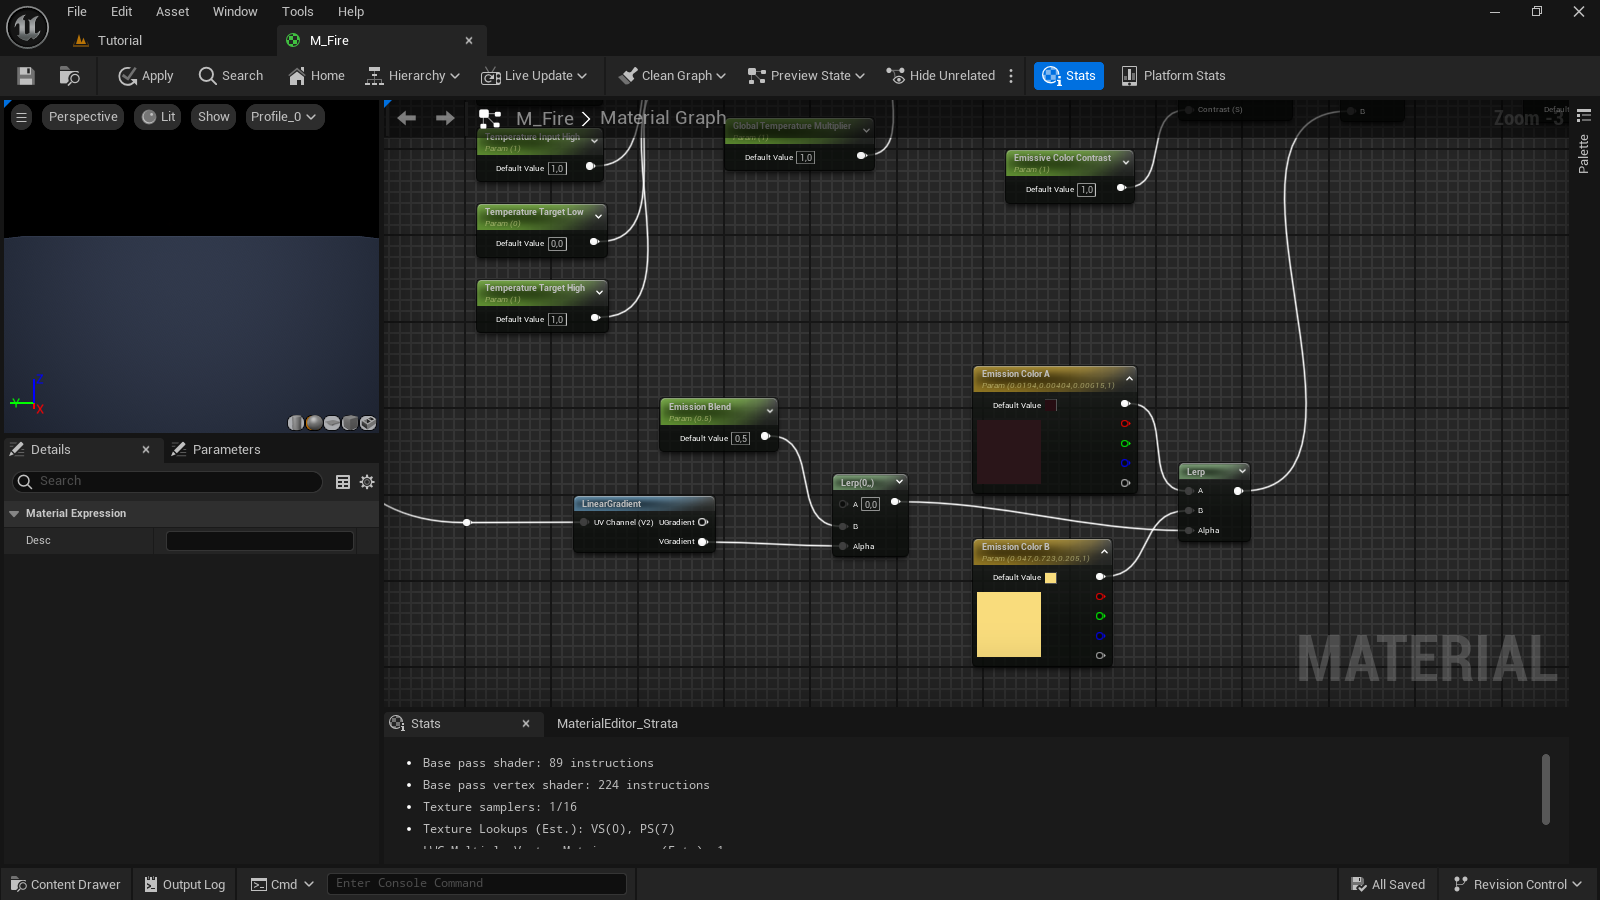
On the image above, note the Emission Color A. I was able to get the correct color using the very opposite color in the color wheel.
For the mist material, I did break the rules. The mist openvdb only has the density information. The mist has some emission, but I wasn't able to get it right. Then, I discovered that multiplying the values directly by the density, was the way to get the correct shading.
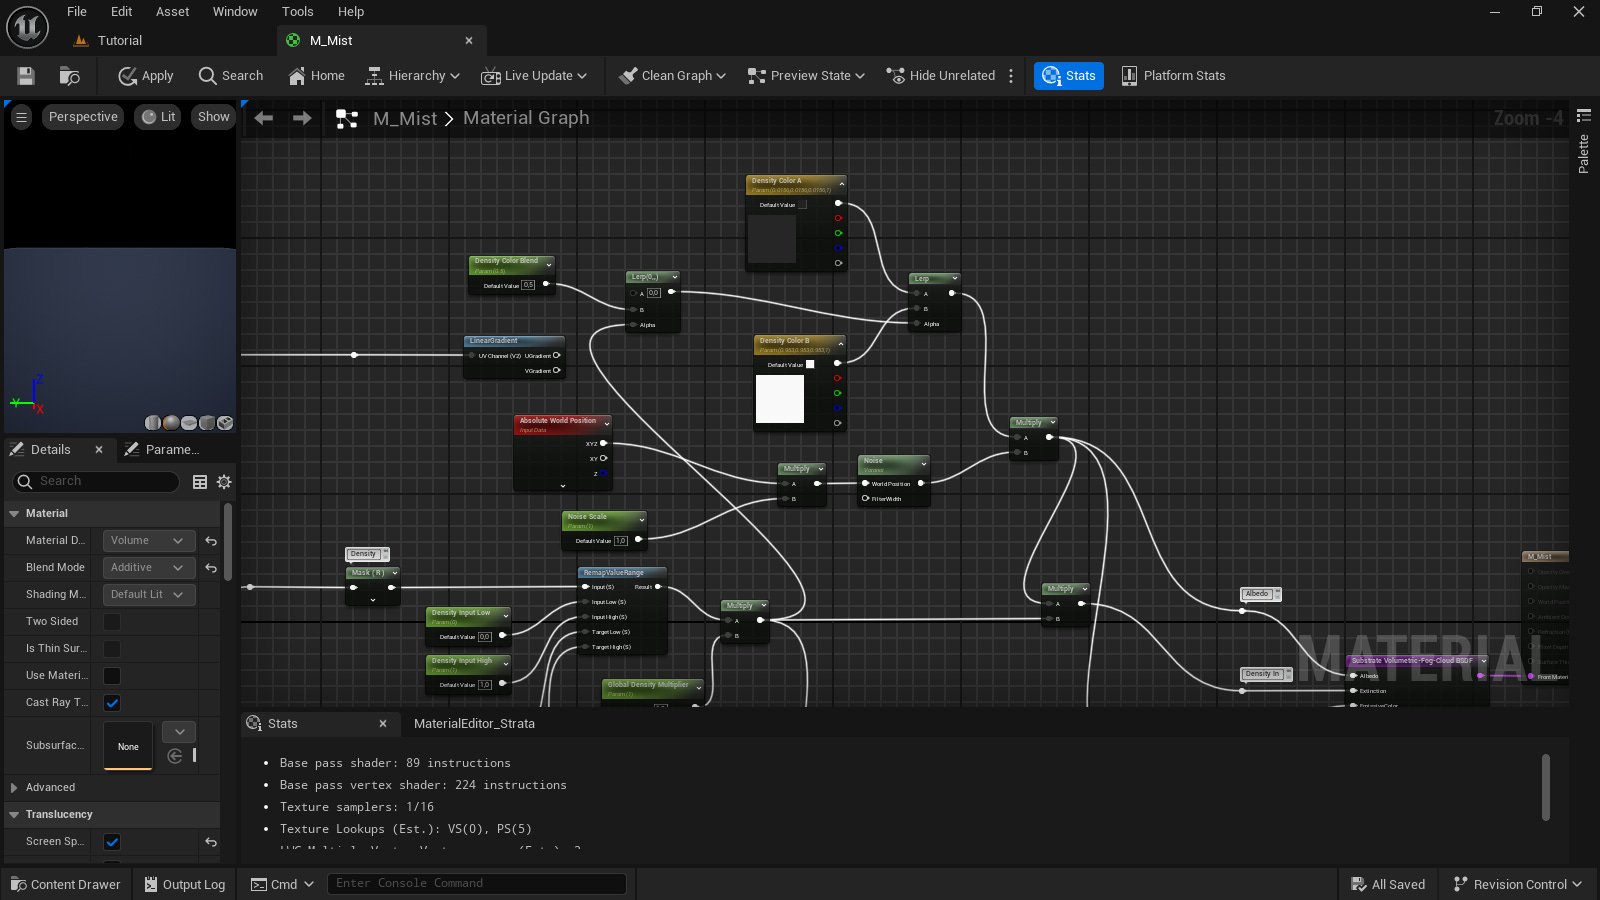
For more details and in-depth analysis about the shaders, the reader can acquire the Unreal project at the Slick3d.art Gumroad page.
The artist must no forget that the volume material must have the Additive blend mode and to have Used with Heterogeneous Volumes enabled.
Despite the use of r.HeterogeneousVolumes.IndirectLighting 1 to enable the heterogeneous volume indirect lighting, the volume barely illuminates the scene. On this project, I created a spot light and used a light function material to simulate the fire lighting the head.
The lighting function material, actually, was borrowed from another project. It's not so complicated but, certainly, it's laborious and I'll not will explain the logic here because it's not the aim of this tutorial. If the reader wants to take a closer look on it, consider to acquire the project files at the Slick3d.art Gumroad page.
Also, I used lighting channels to make the fire light only to affect the head and not the mist or the fire itself.
I used the geometry in this scene in many softwares, doing a lot of tests. To build the scene in Unreal, I used the Datasmith plugin in 3DS Max. The scene was made using V-ray, and because of this, there's a HDRI geometry that I use both to lighting the scene and make the background in Unreal. The HDRI file was created in Terragen.
Then, there's a material for the HDRI geometry, which was the domelight in the V-ray scene.
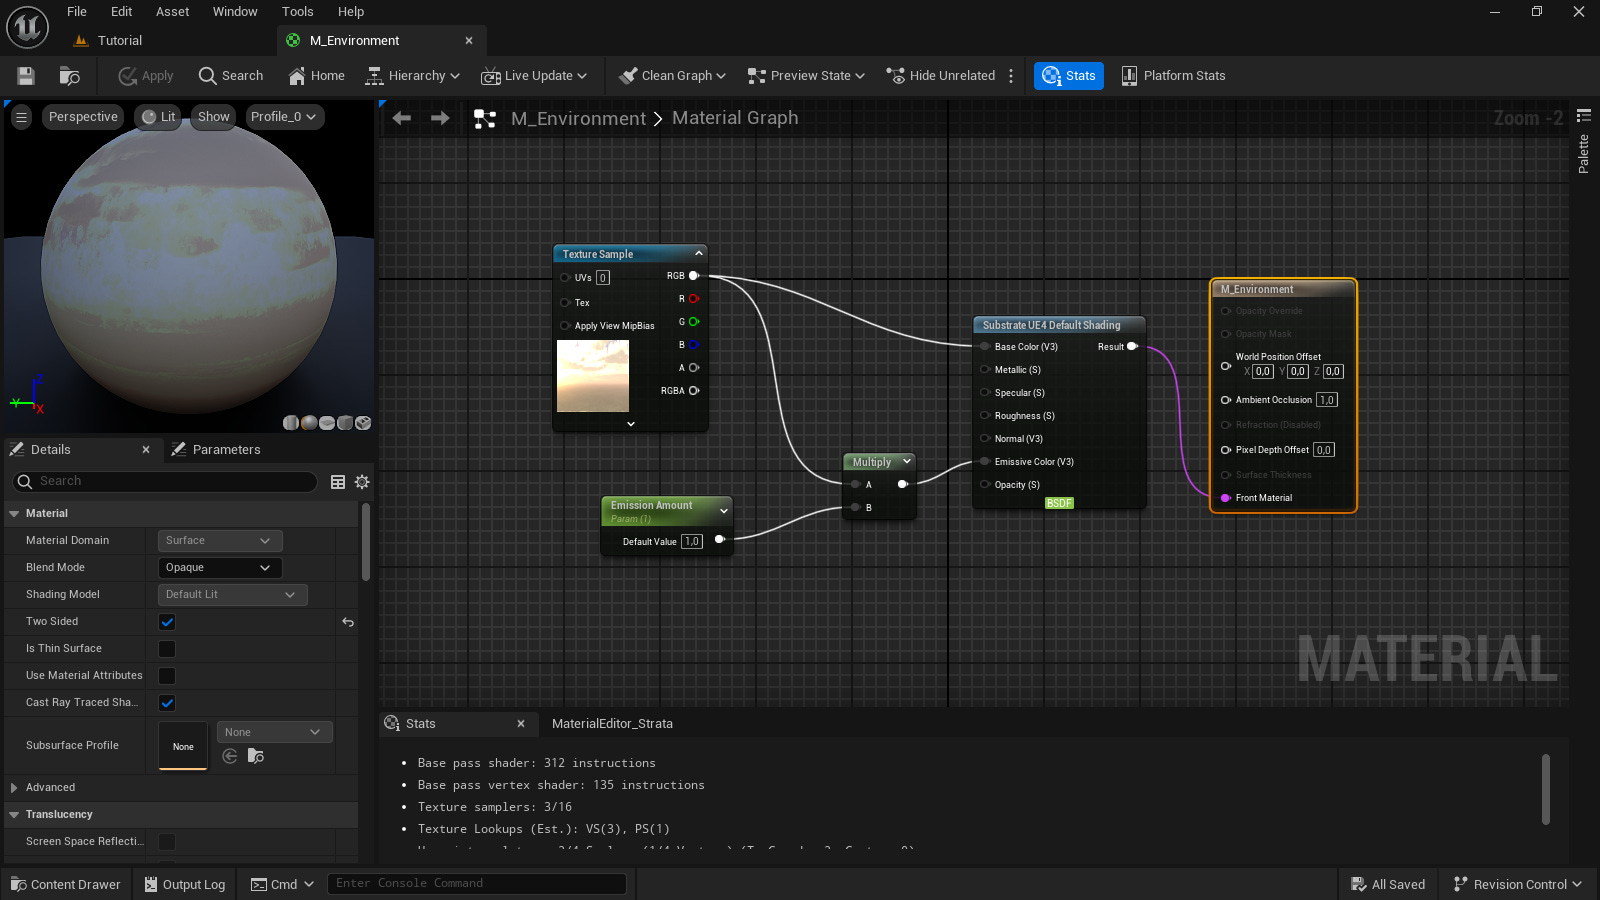
Finally, it's time to render the sequence. I always use ACES as colorspace and I do not disable game settings, because if I do this, I can't define the exposure and other settings through my camera.
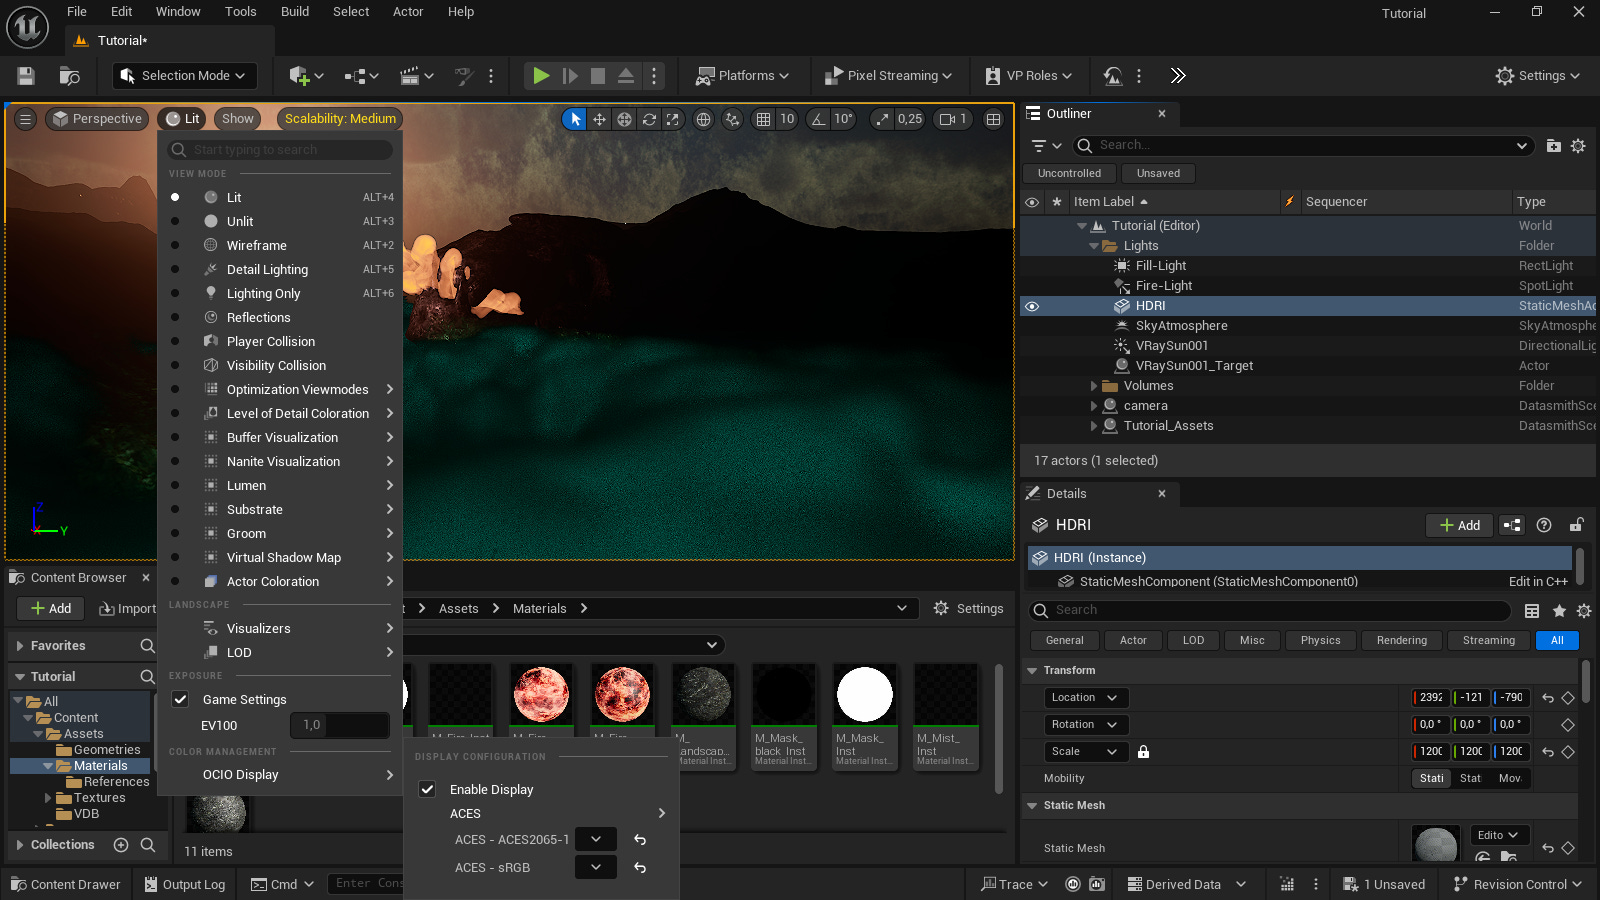
Therefore, I do not use the override game settings options in the Movie Render Queue. Instead, I use console variables to tweak the final quality of the render. The easiest way to do this, is to create a preset with all variables, then load the preset using the movie render queue.
Note that r.HeterogeneousVolumes.MaxTraceDistance 1000000 must be present on the render configuration. If not, the volumes will not render.
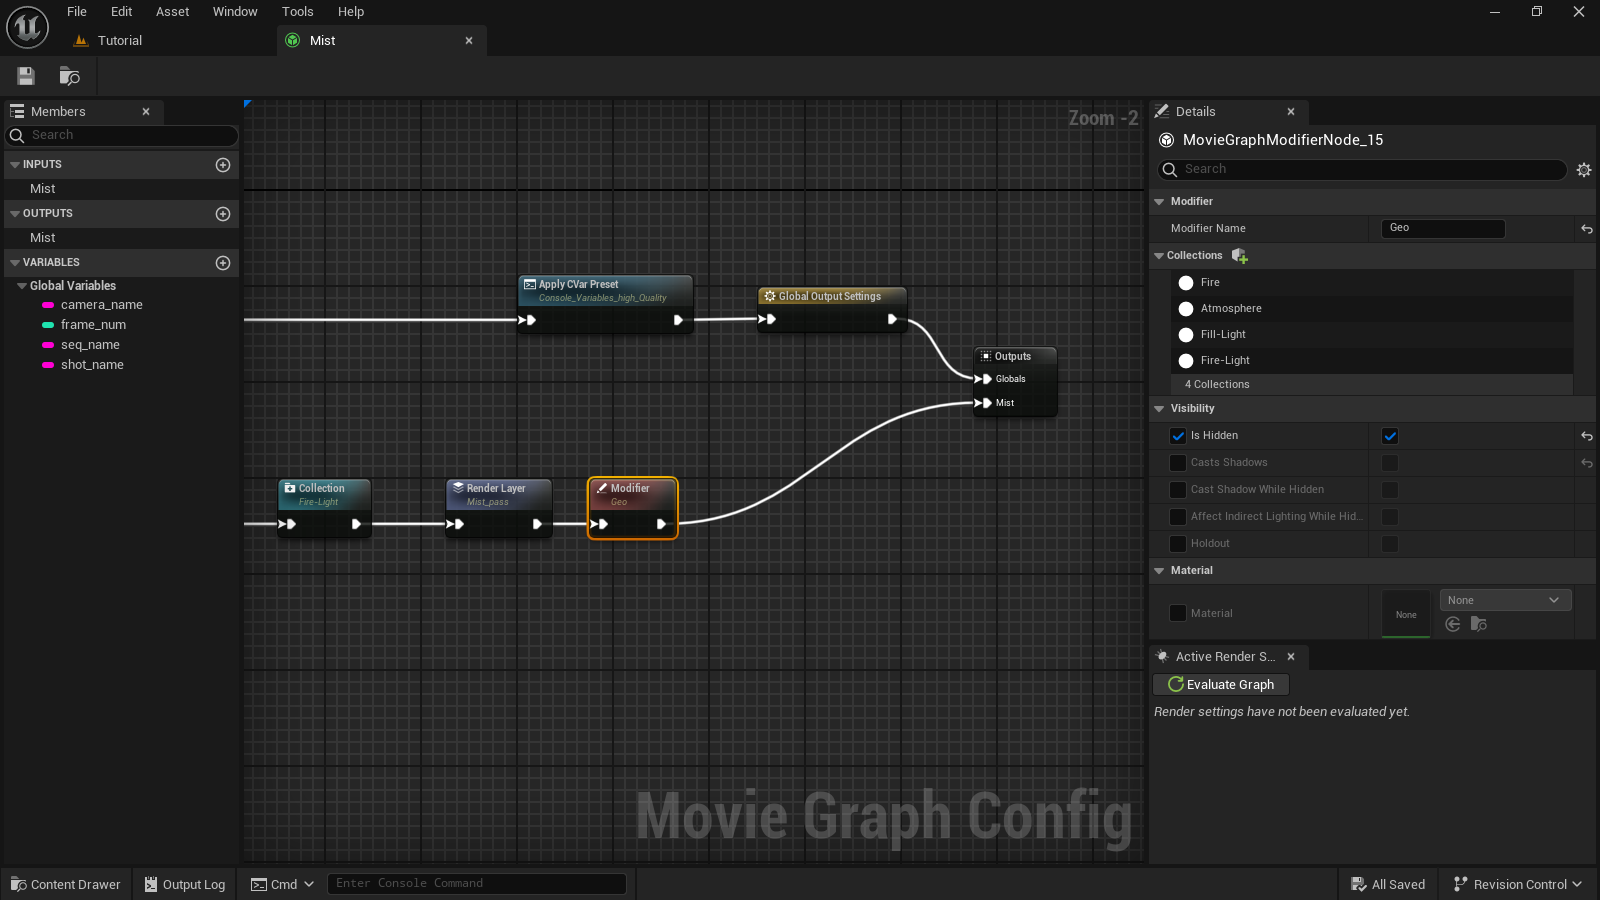
This preset will be loaded in the movie render queue but, now in Unreal 5.4, we have something very special: the movie render queue graph editor.
This feature is absolutely fantastic because it allows the artist to easily create render passes, render layers, mattes, depth pass, etc; like in other DCC applications.
If the reader wants an introduction on how to create a Movie Render Graph, take a look at the official documentation here.
On this tutorial I'll show the atmosphere pass, which isolates the atmospheric lighting.
The slots of the input and output node are created on the left tab. Click on the plus sign and write any name desired. This is only visual and does not affect the final output, though.
The Deferred Renderer node has sampling, tone mapping settings and post processing settings.
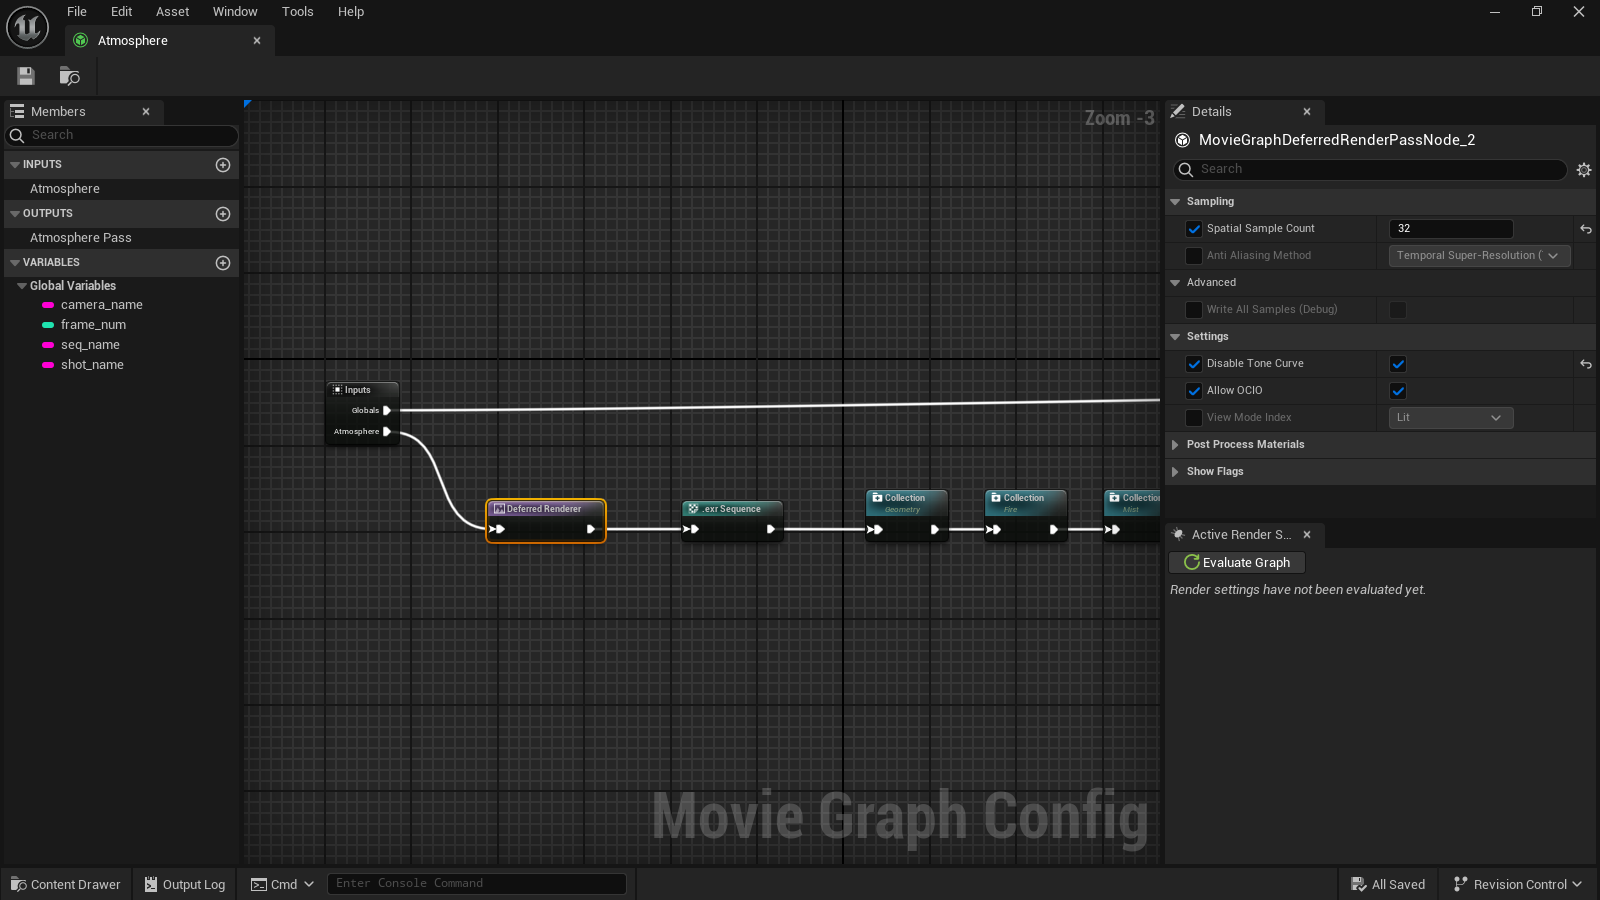
The exr Sequence node defines the name pattern of the file to be saved and allows to choose compression options.
The next step was to split the objects in collections. A collection will permit to easily mask a geometry or light on a render layer. However, a caution is needed: a light actor cannot be on the same collection of a geometry. Therefore, it's better to have a specific collection to each light actor.
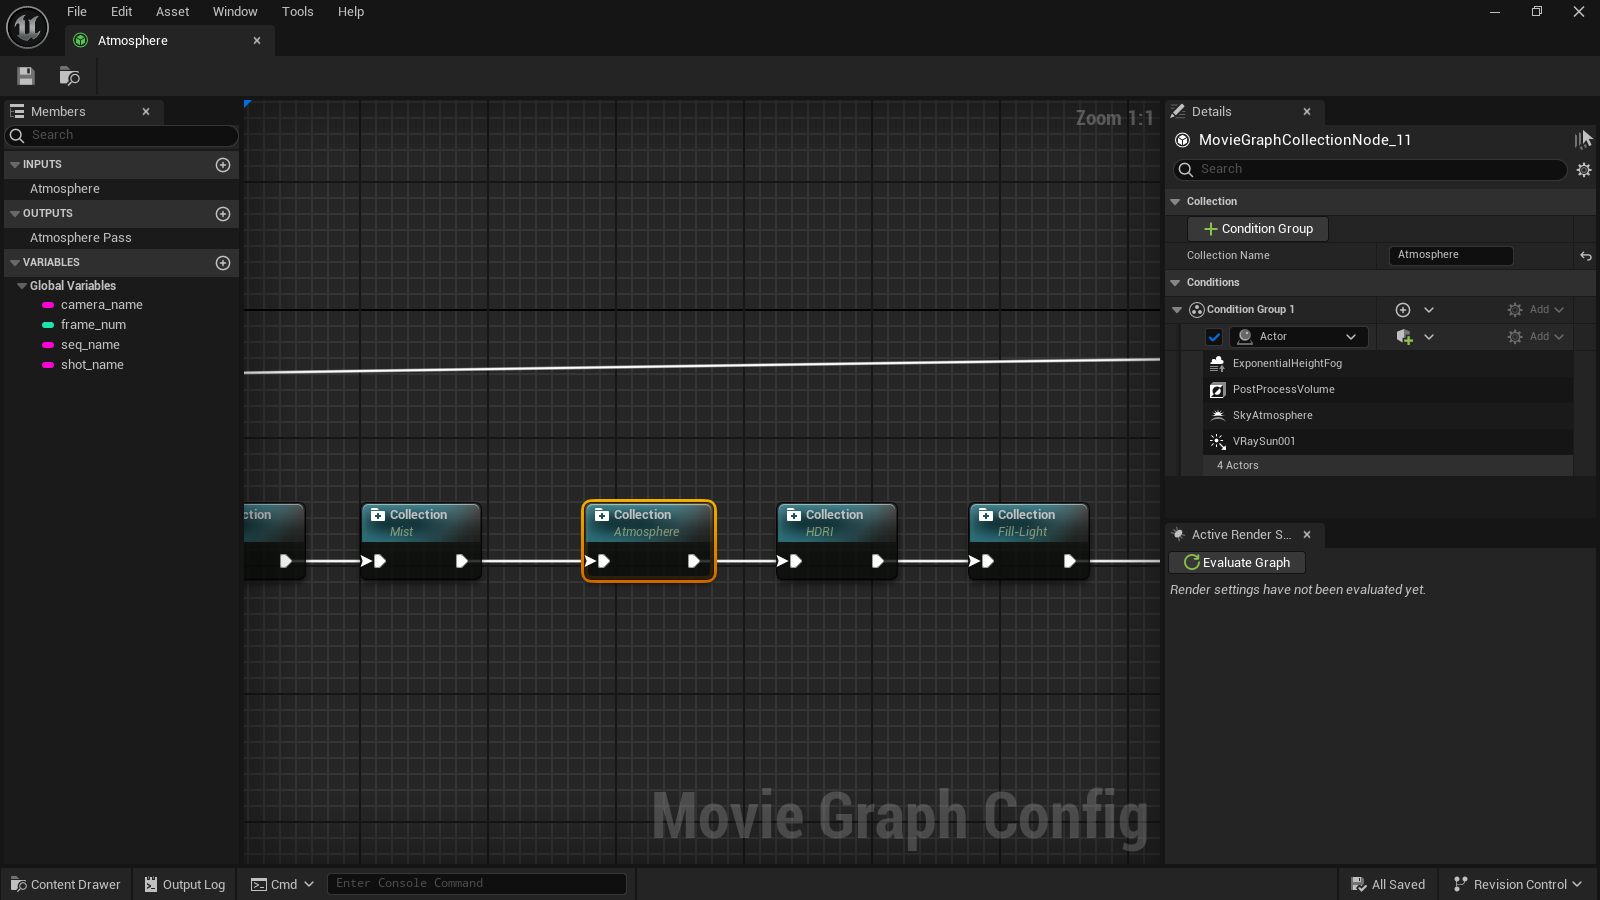
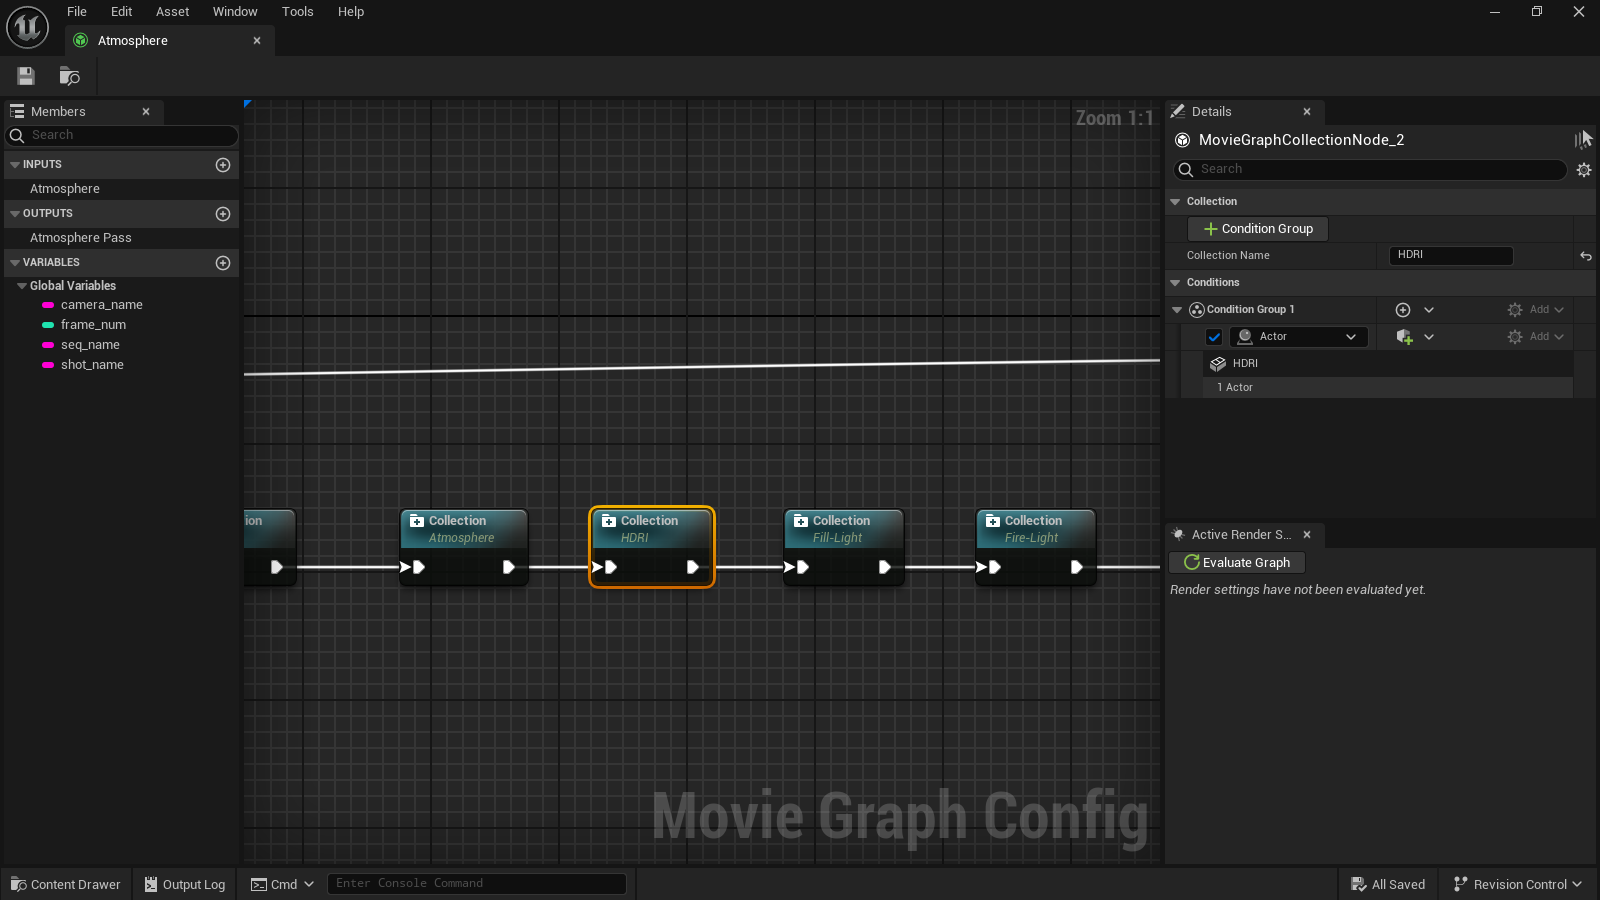
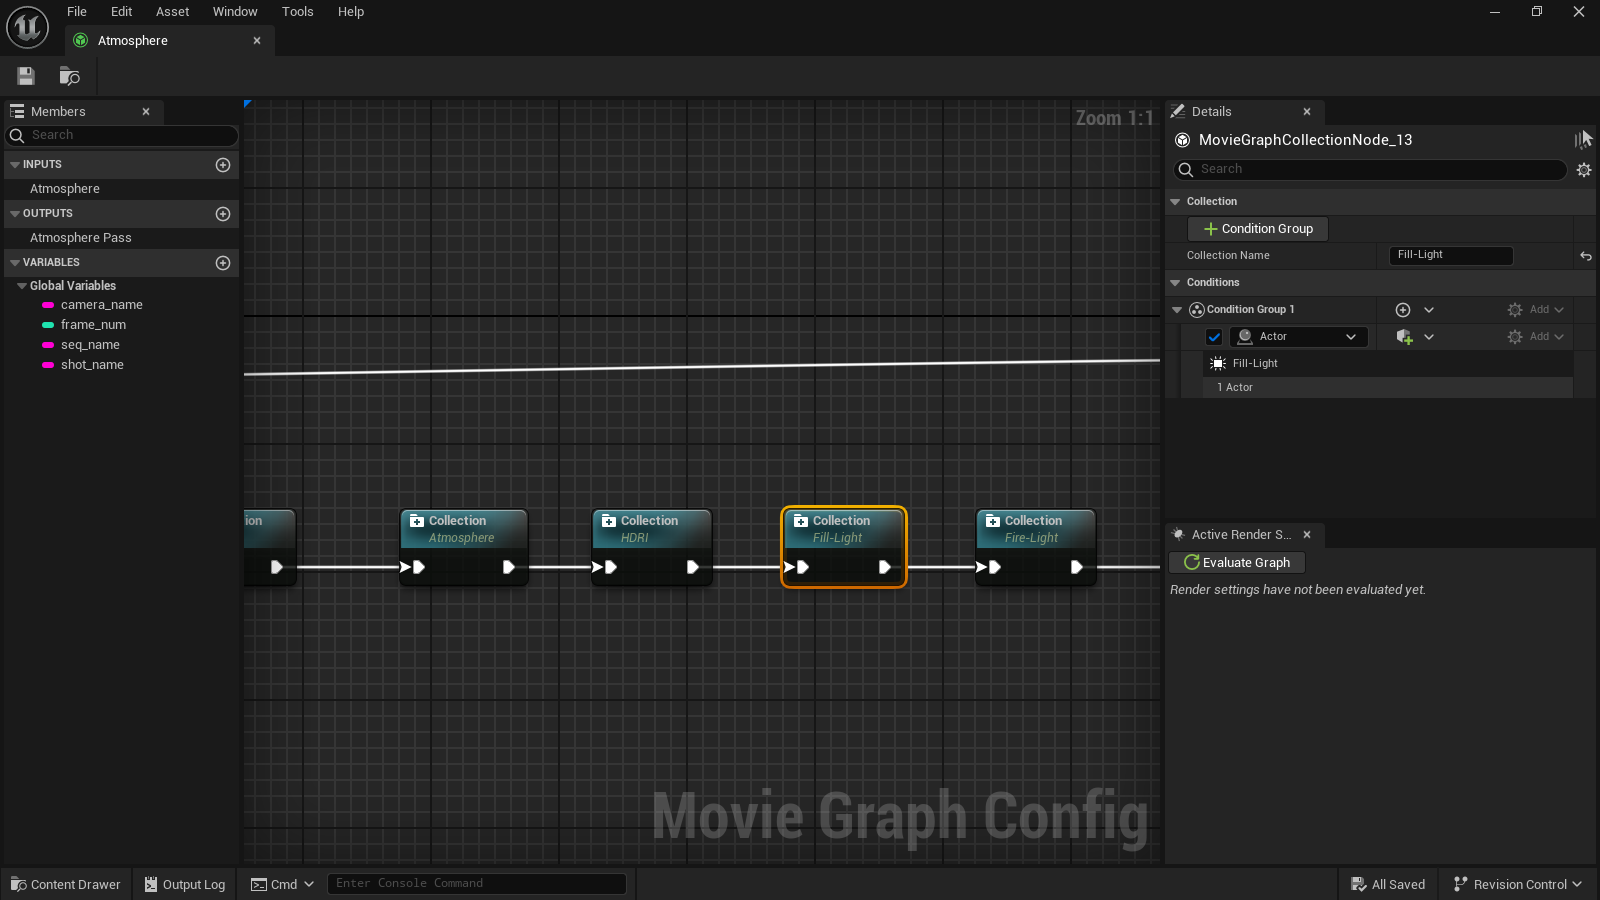
And yes, a complex scene probably will have a large number of collections, but the artist will be hugely compensated on post-production.
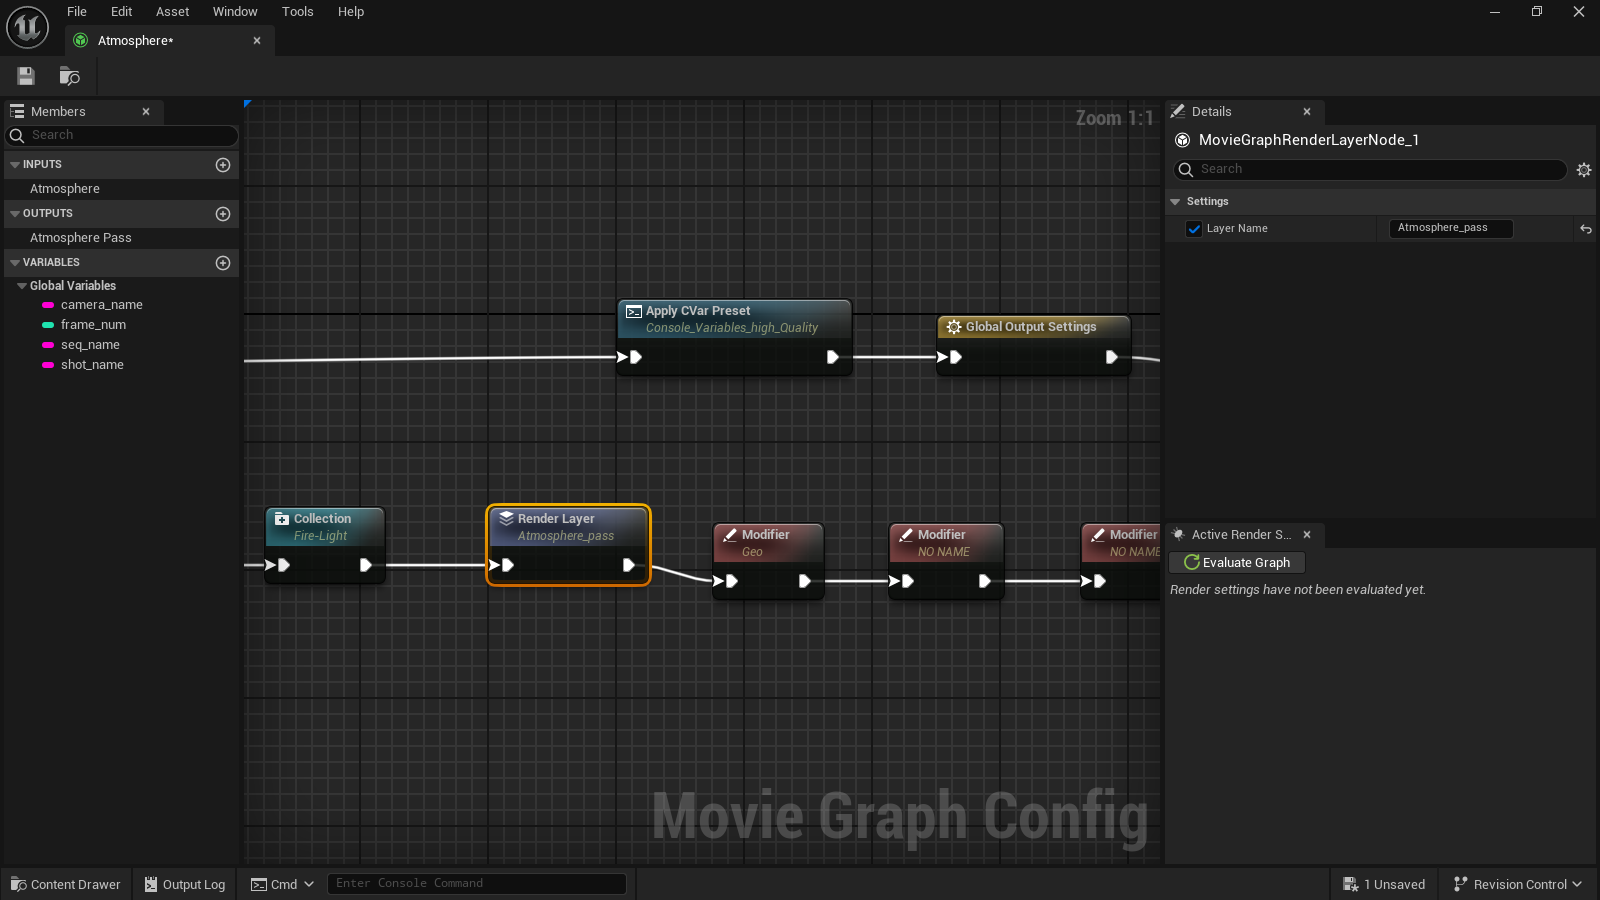
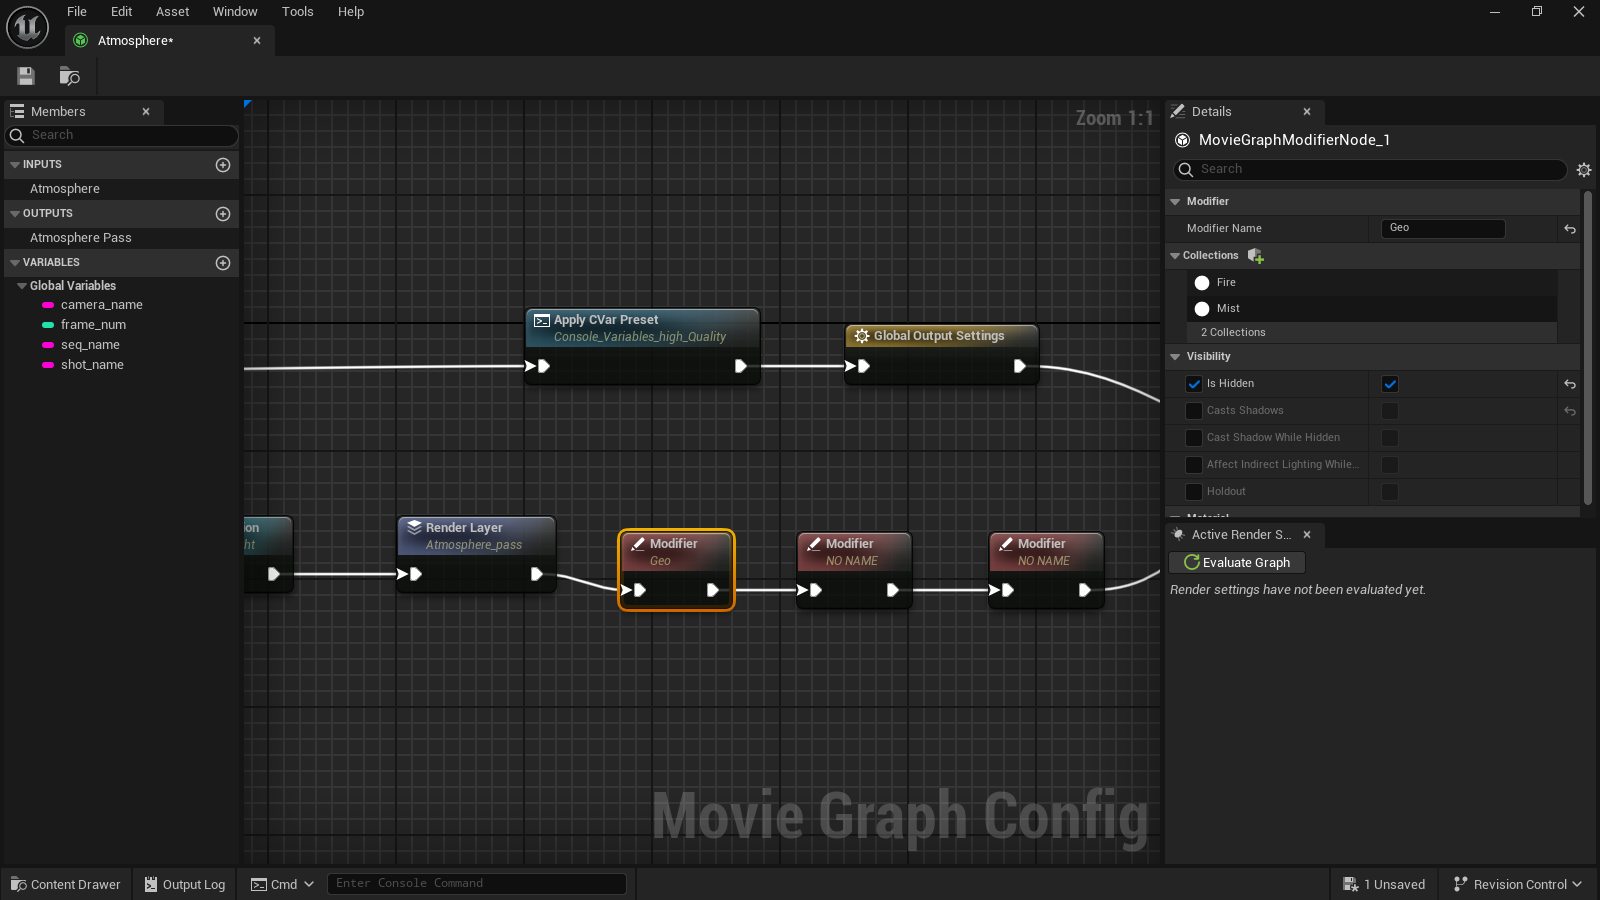
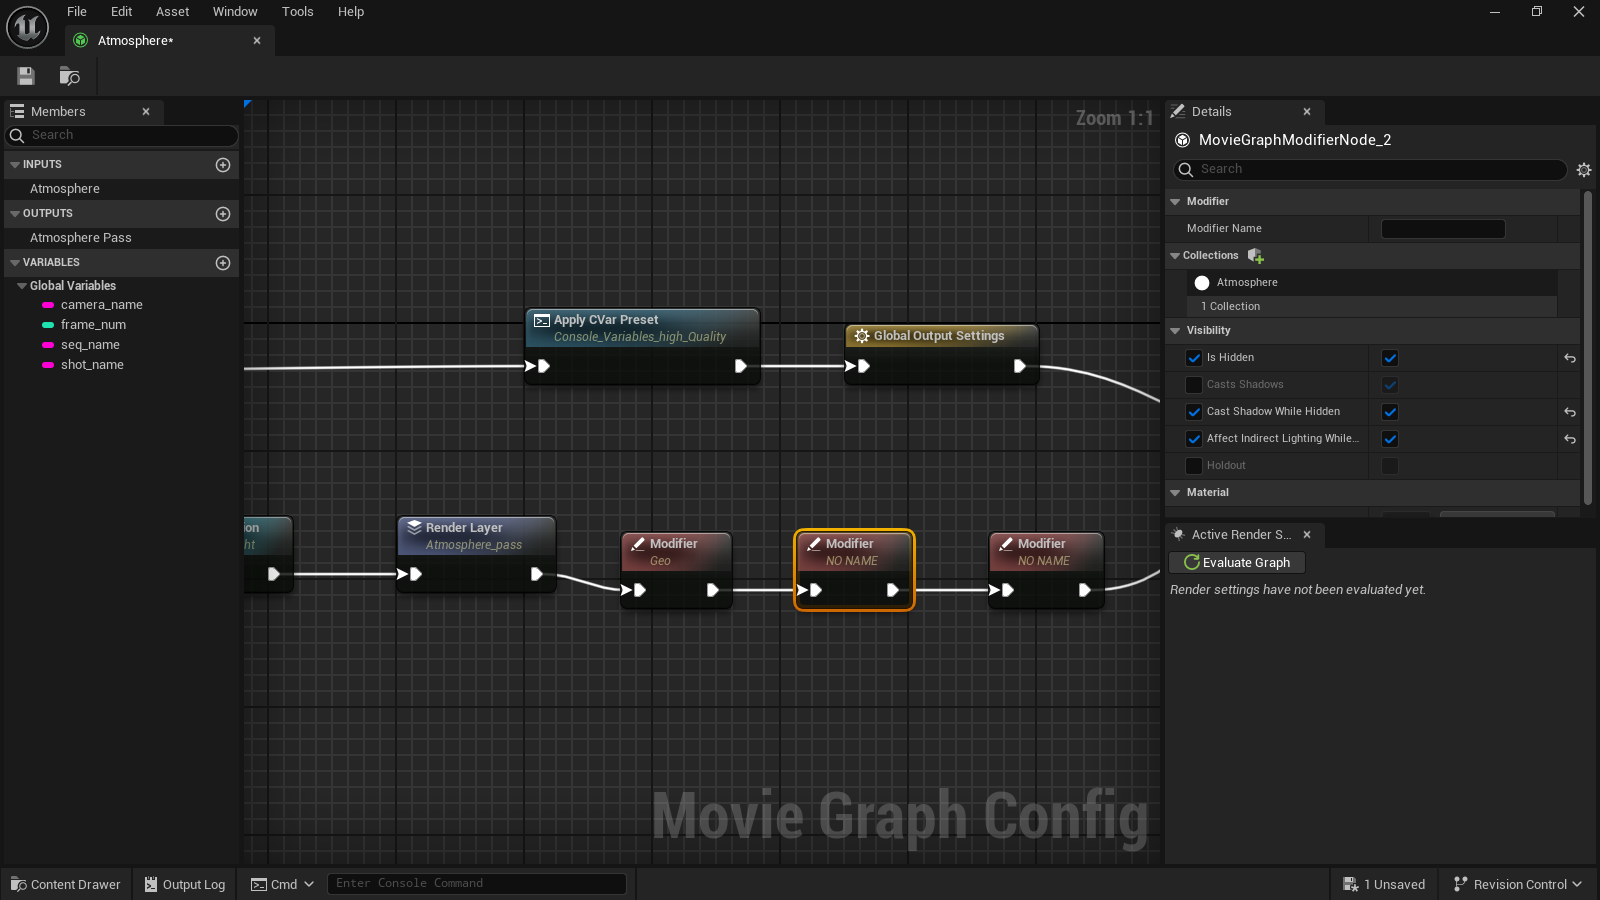
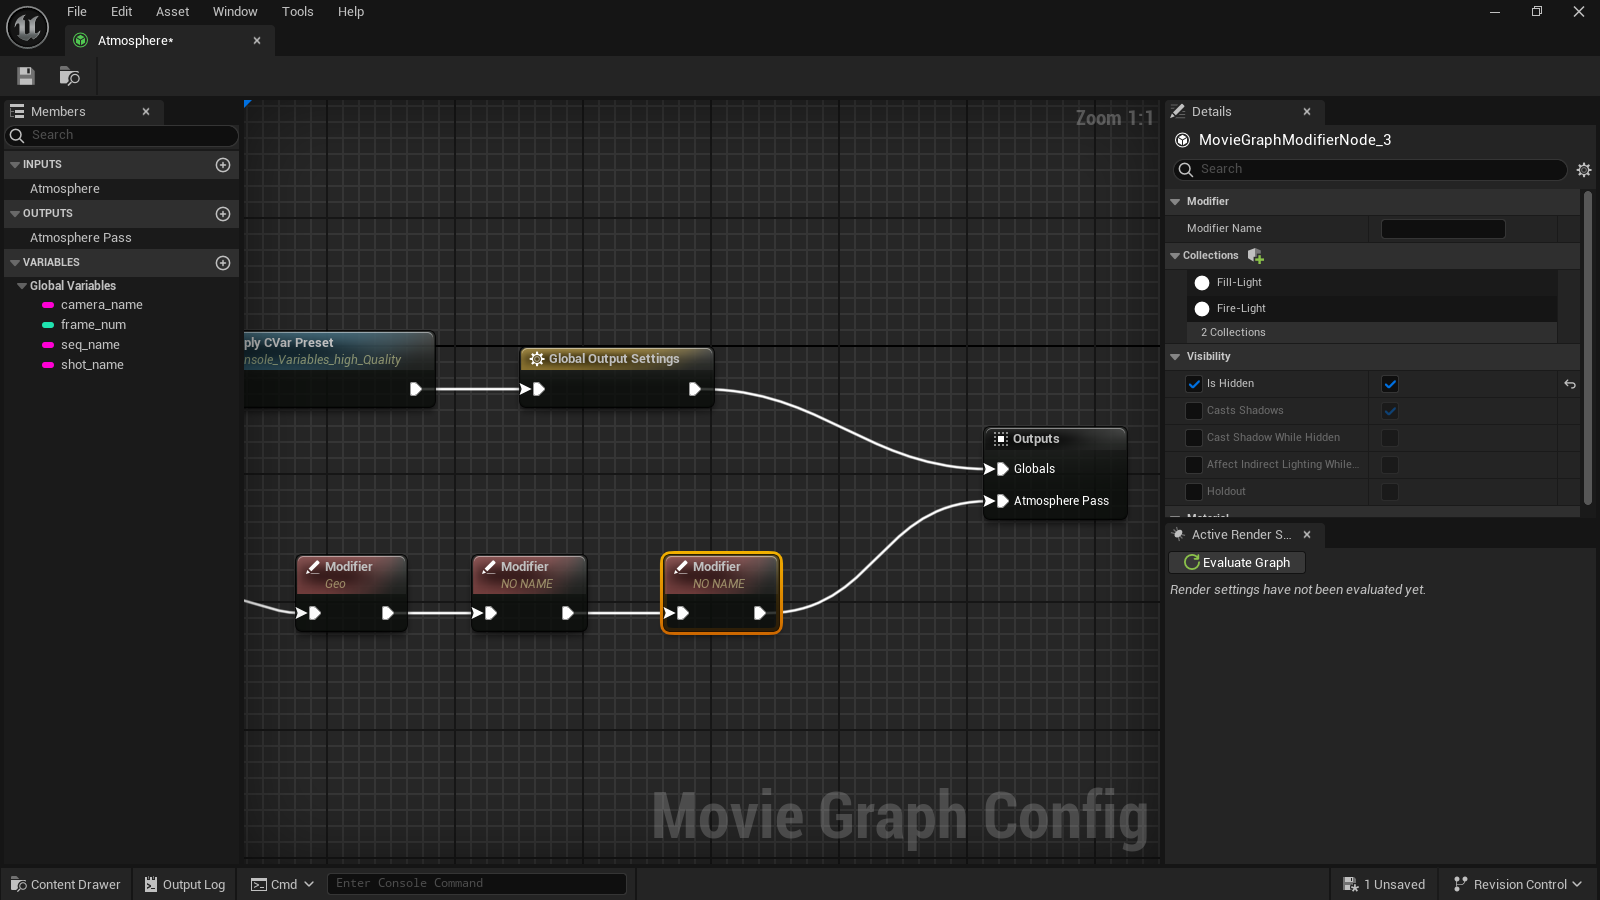
Following, the Modifier node is where the masking is created. The mask will isolate what will be rendered in the layer. In this case, the layer will only render the components that forms the atmospheric lighting, all the others will be hidden.
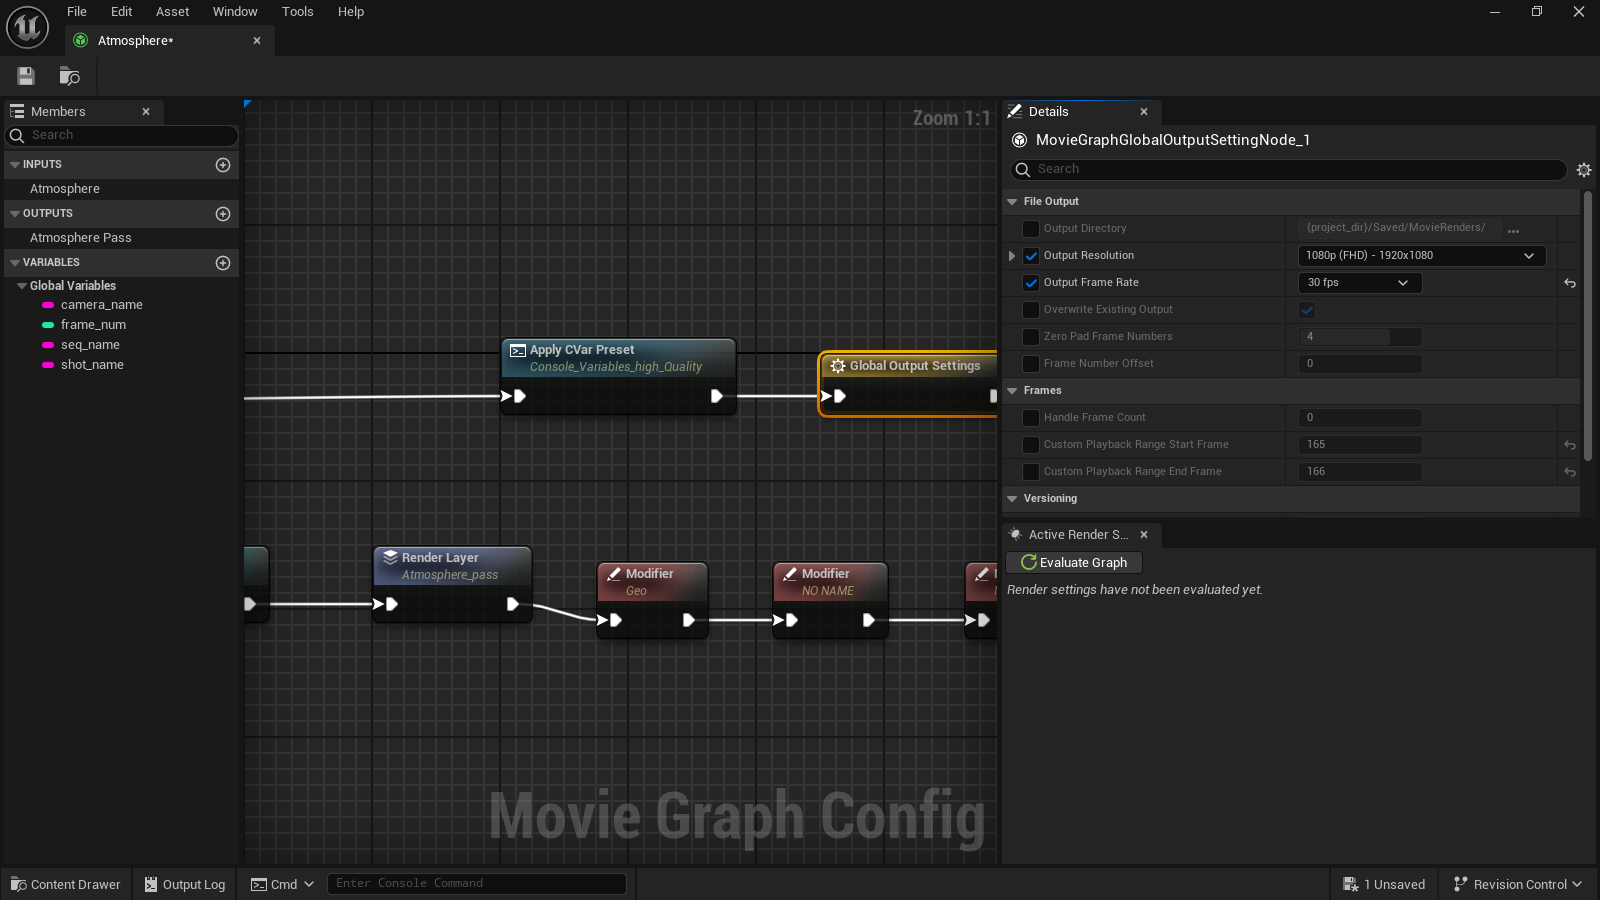
And what the render layer atmosphere_pass will give to the artist, it is exactly what the name says, the atmospheric lighting:
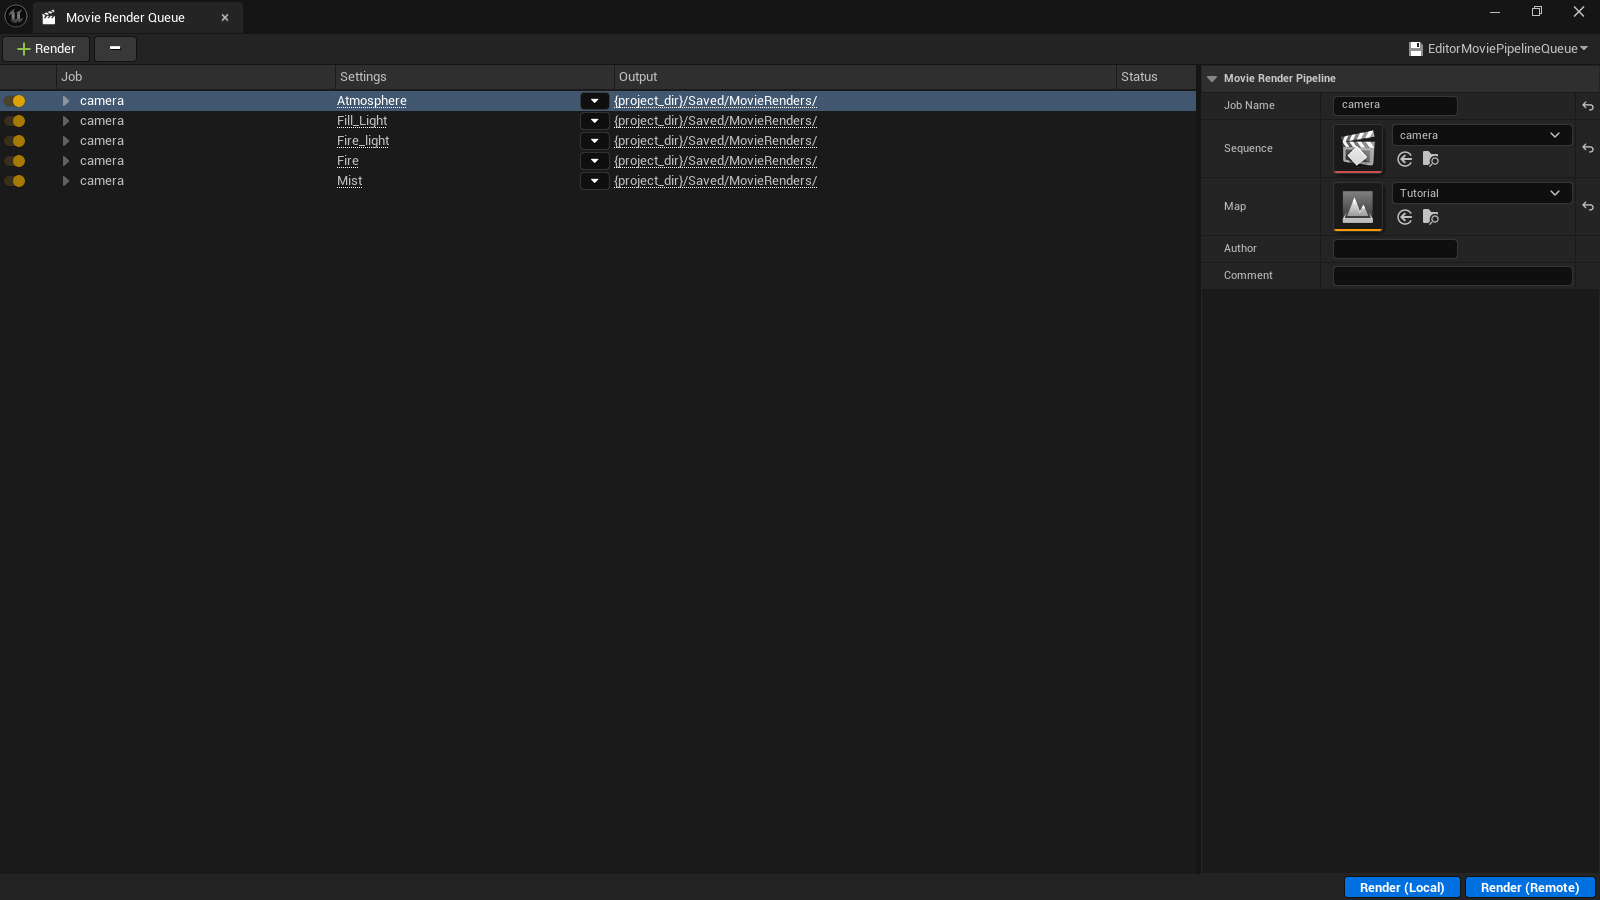
In the movie render queue I duplicated this job and did the required modifications to render the other layers or passes as I'm calling them on this tutorial. The expression passes is more related to something as depth pass, normal pass etc., but I'm sure the reader understands what I'm saying. By the way, a depth pass, normal pass and others can be obtained using the render queue graph. There's an option to override a material in the modifier node that allows that.
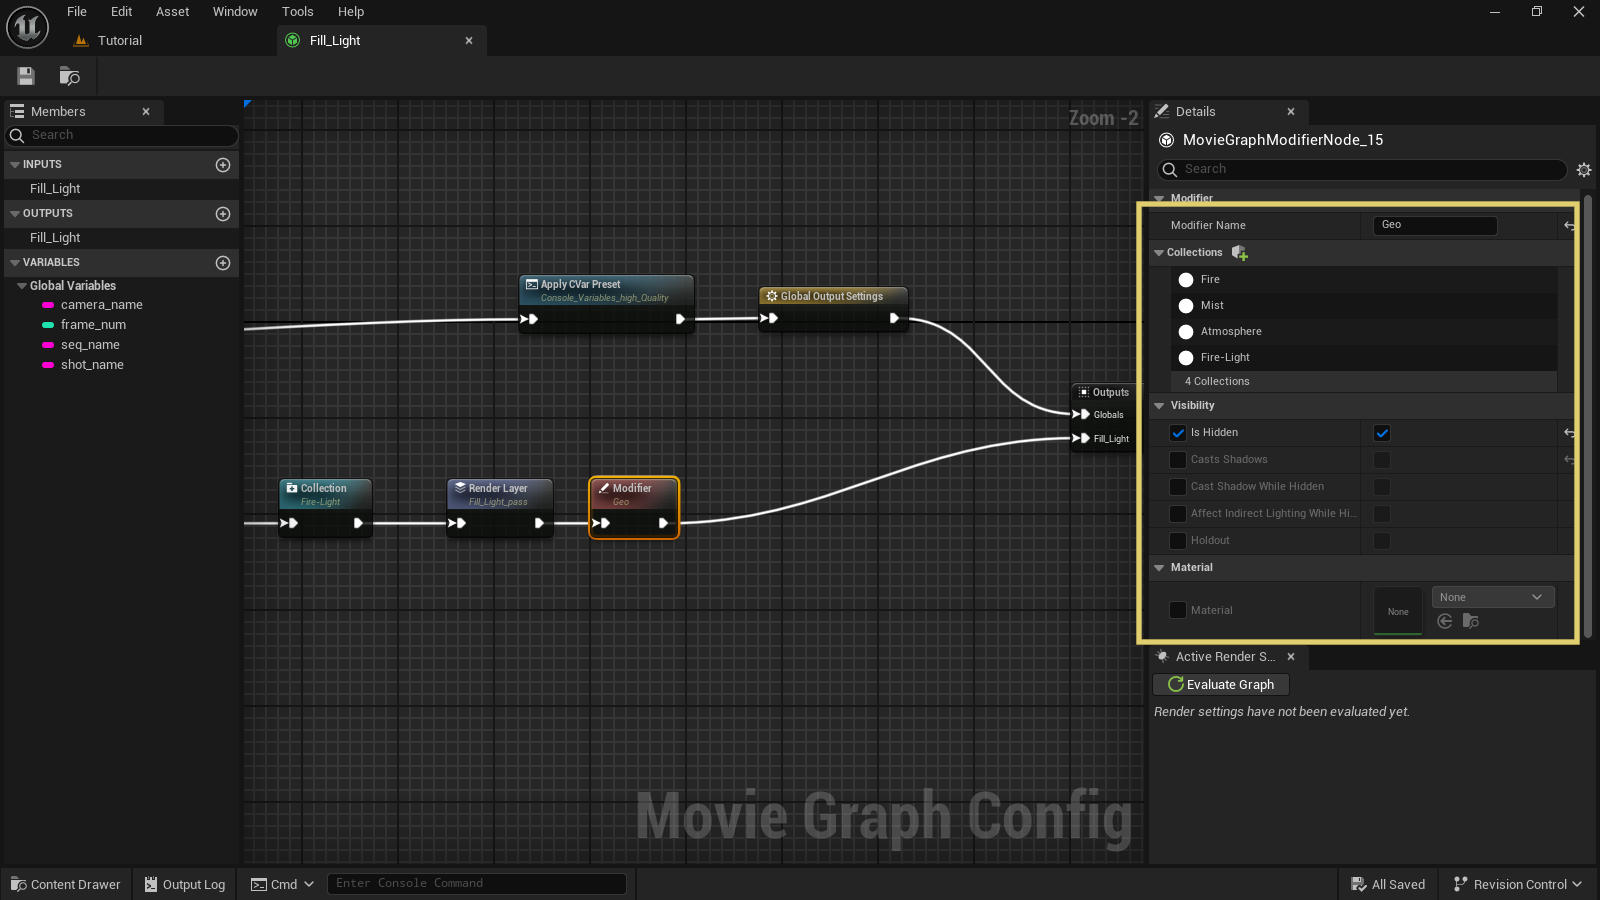
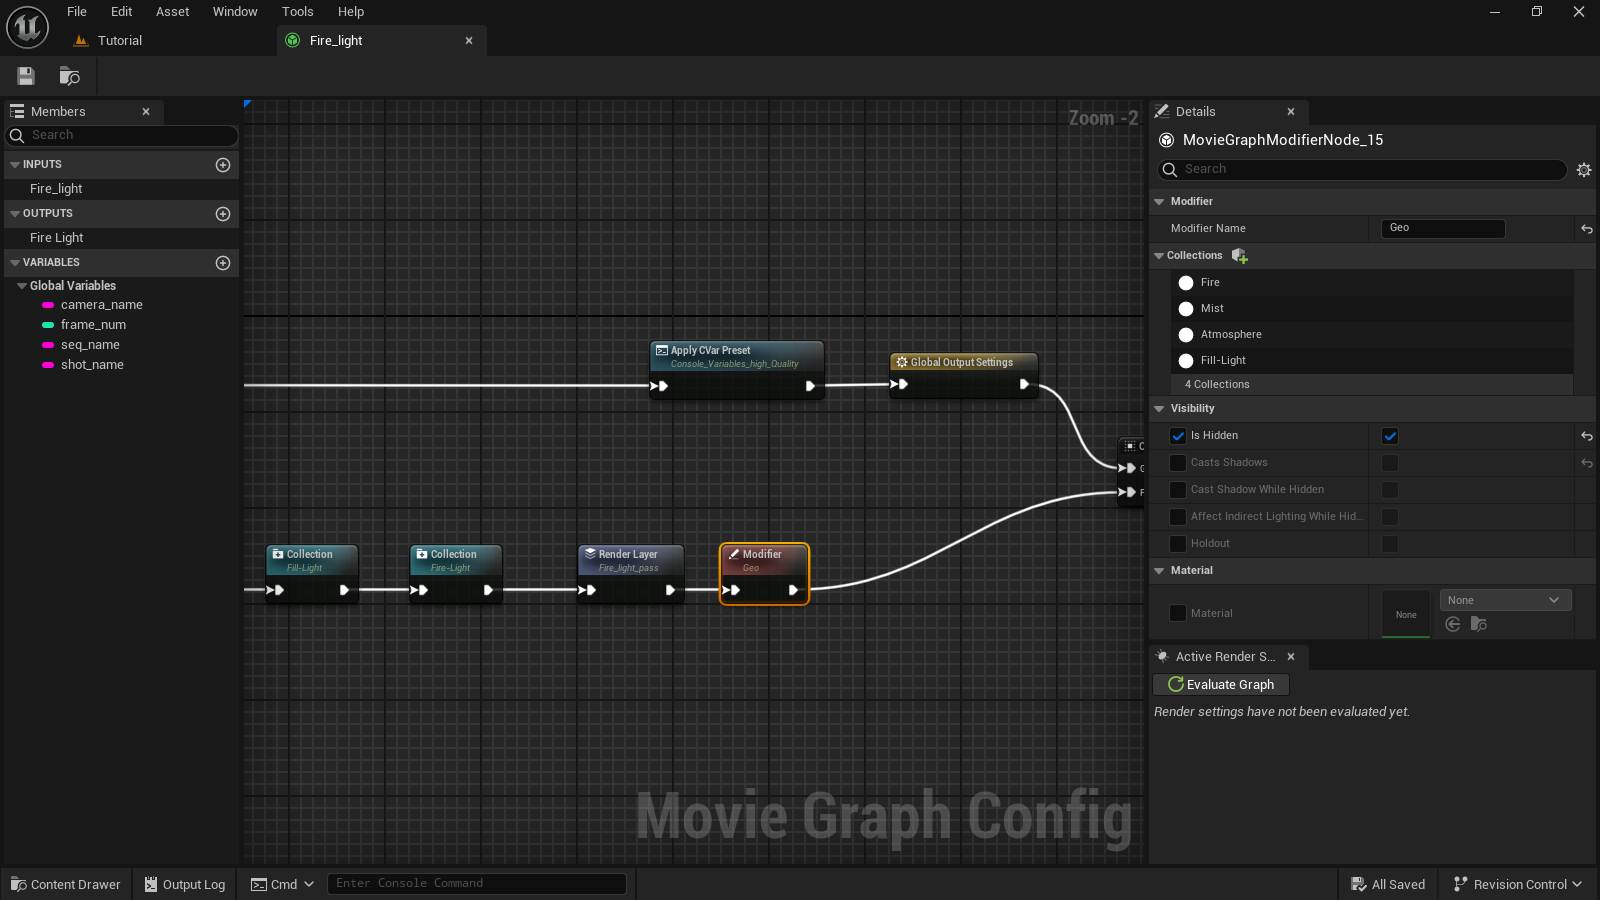
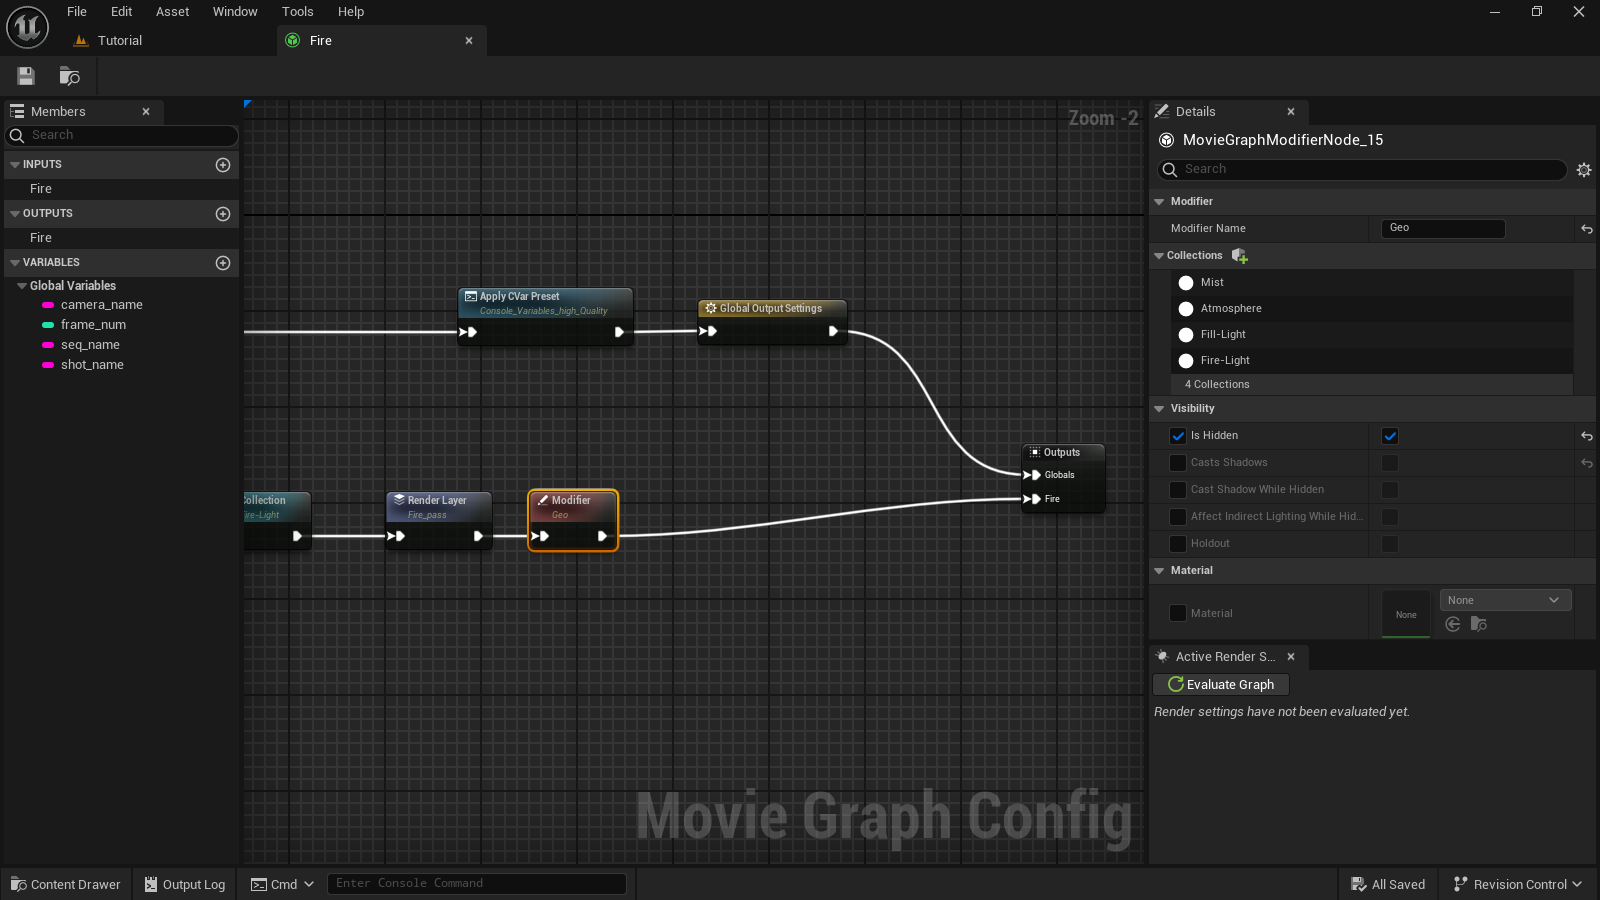
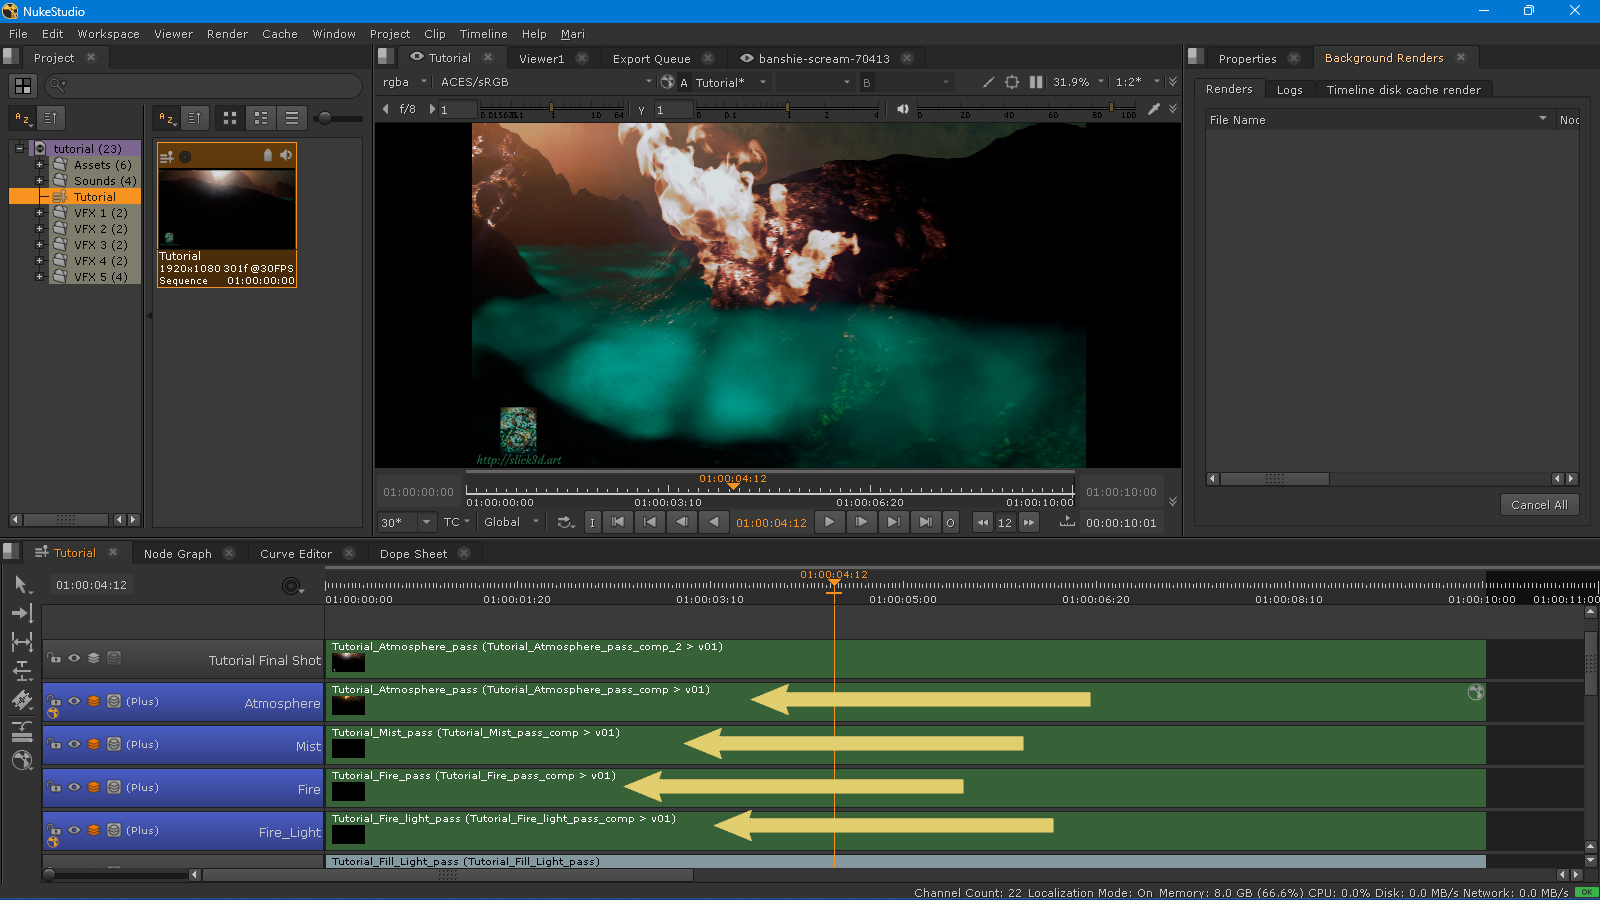
The beauty of all this is that the artist will assemble the render layers inside your favorite image/animation editor, with absolute control on each render layer.
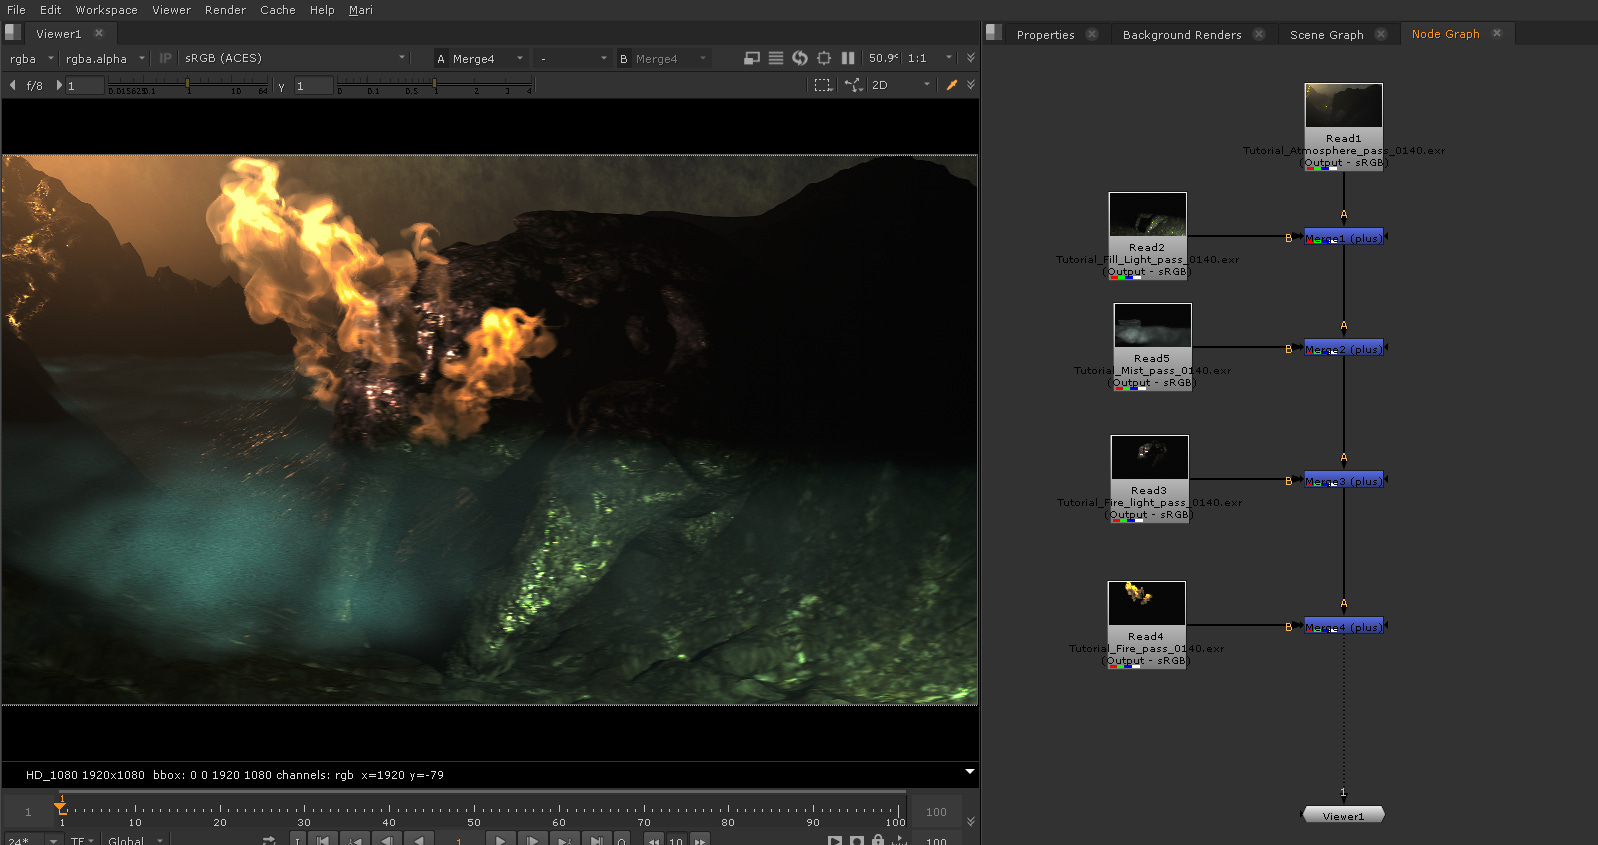
Now, the artist can easily modify each element because they are already isolated. Sweet.
But wait, there's more: by splitting the Unreal scene on render layers, the actual render is done faster and each render job will consume less memory. Then, there are only benefits on doing this process. And here is the final result:
For the final shot, I did the comp of the sequence in Nuke Studio. To have each render layer sequence isolated, made the final composition a task very easy and fast to do.
And this is the final shot:
Are you interested in take a closer look on this project? The reader can acquire it on the Slick3d.art Gumroad page.


