
Lightwave 3D - Realflow workflow
This is a tutorial about how to export Realflow simulations and import them in Lightwave 3D version 2019 and above.

The Last Realflow connection plugin for Lightwave was for the 2018 release. That made to import Realflow simulations a nightmare in Lightwave. A lot of artists use an OBJ sequence as a solution, but because Lightwave’s way of work, shading an OBJ sequence might be problematic.
Alembic is also problematic. Lightwave requires a mdd cache for mesh deformation, and Realflow doesn’t provide it.
Work with the native Realflow format is impossible without the connection plugin.
All this have changed with the introduction of the OpenVDB Toolkit in Lightwave.
Using Lightwave’s OpenVDB toolkit, the artist can replicate Realflow’s VDB Mesher operation in Lightwave, and do the shading without the necessity of plugins or scripts. Actually, with the OpenVDB toolkit, the Realflow worklow to Lightwave has become completely fast and straight.
Let’s see how this work.
In Realflow.
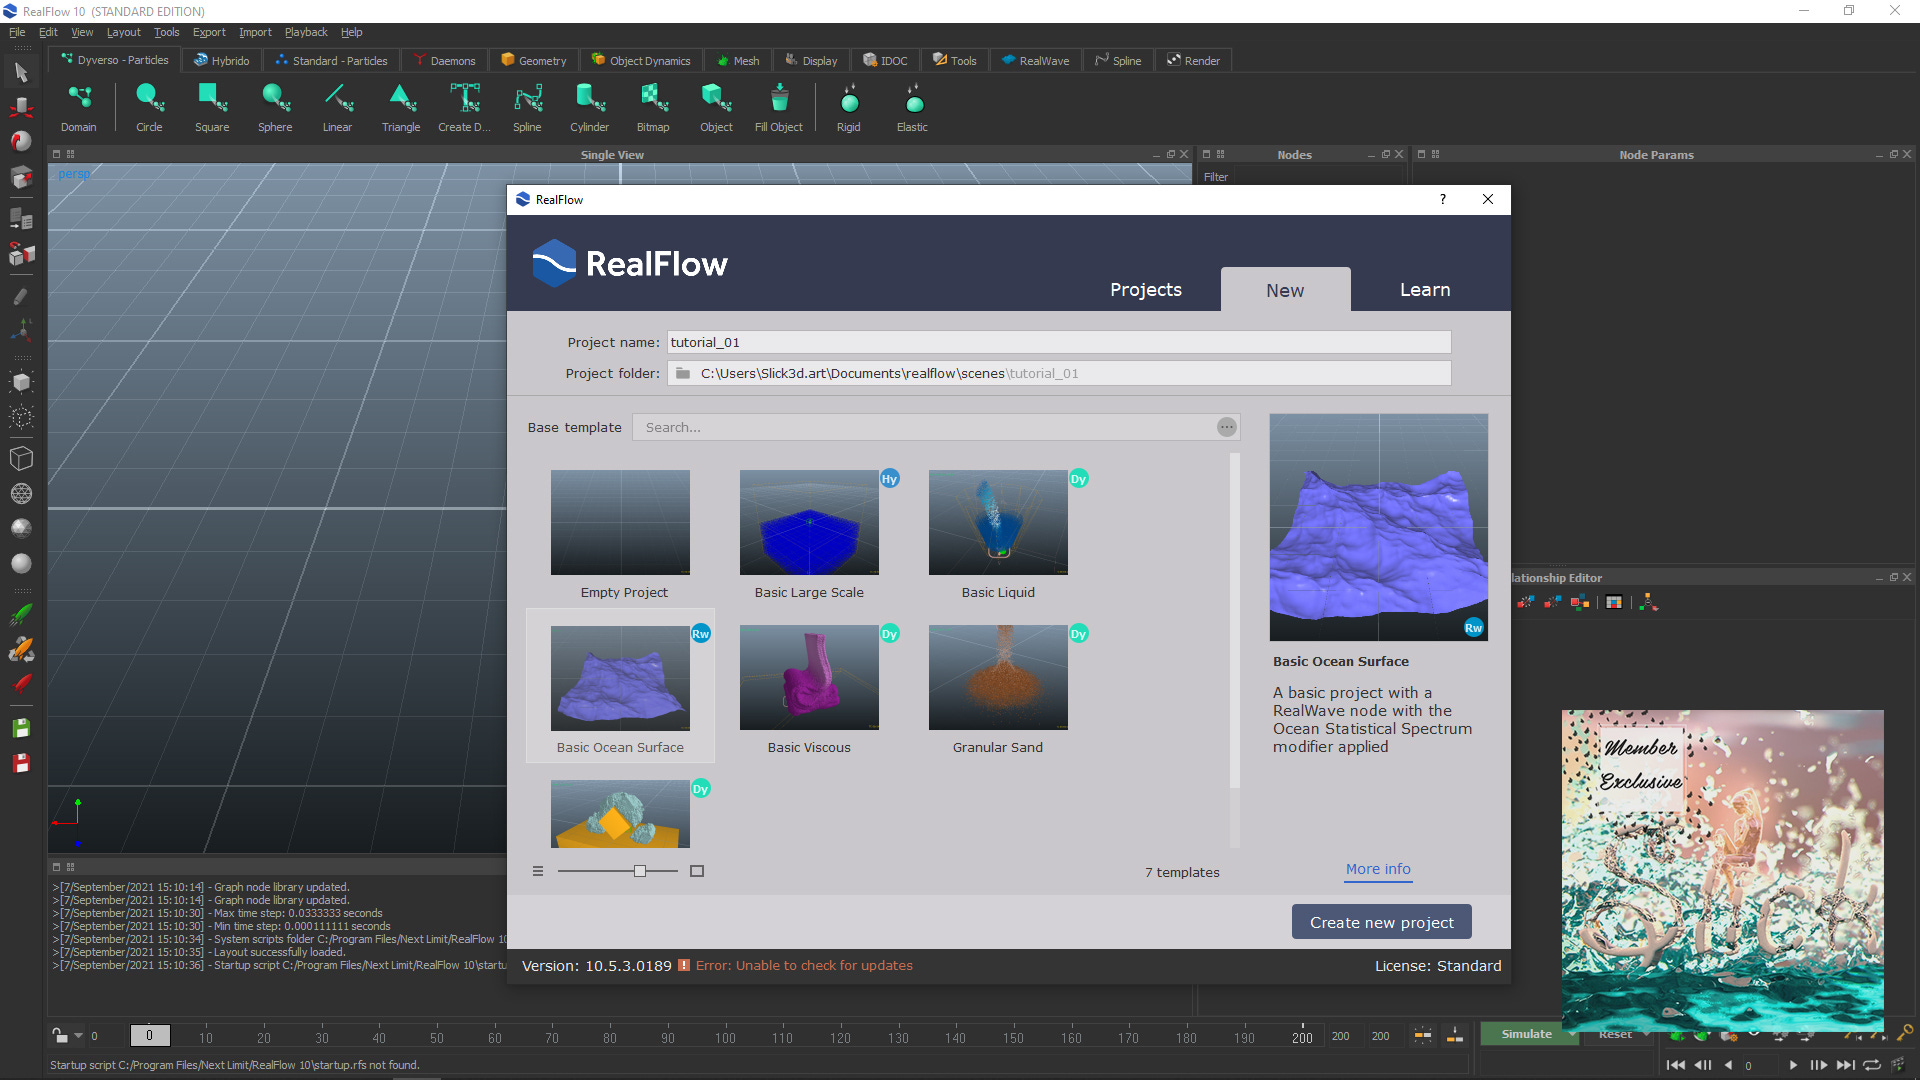
I’m going to use the Basic Ocean Surface project. You can define the project name and project folder of your choice. Here, I named this project as tutorial_01, since this tutorial is the first one of a series dedicated to Realflow-Lightwave 3D workflow.
The ocean created is very small, only 5 by 5 meters. I’ll resize it to 30 by 30 meters and increase the polygon size to 0.1.
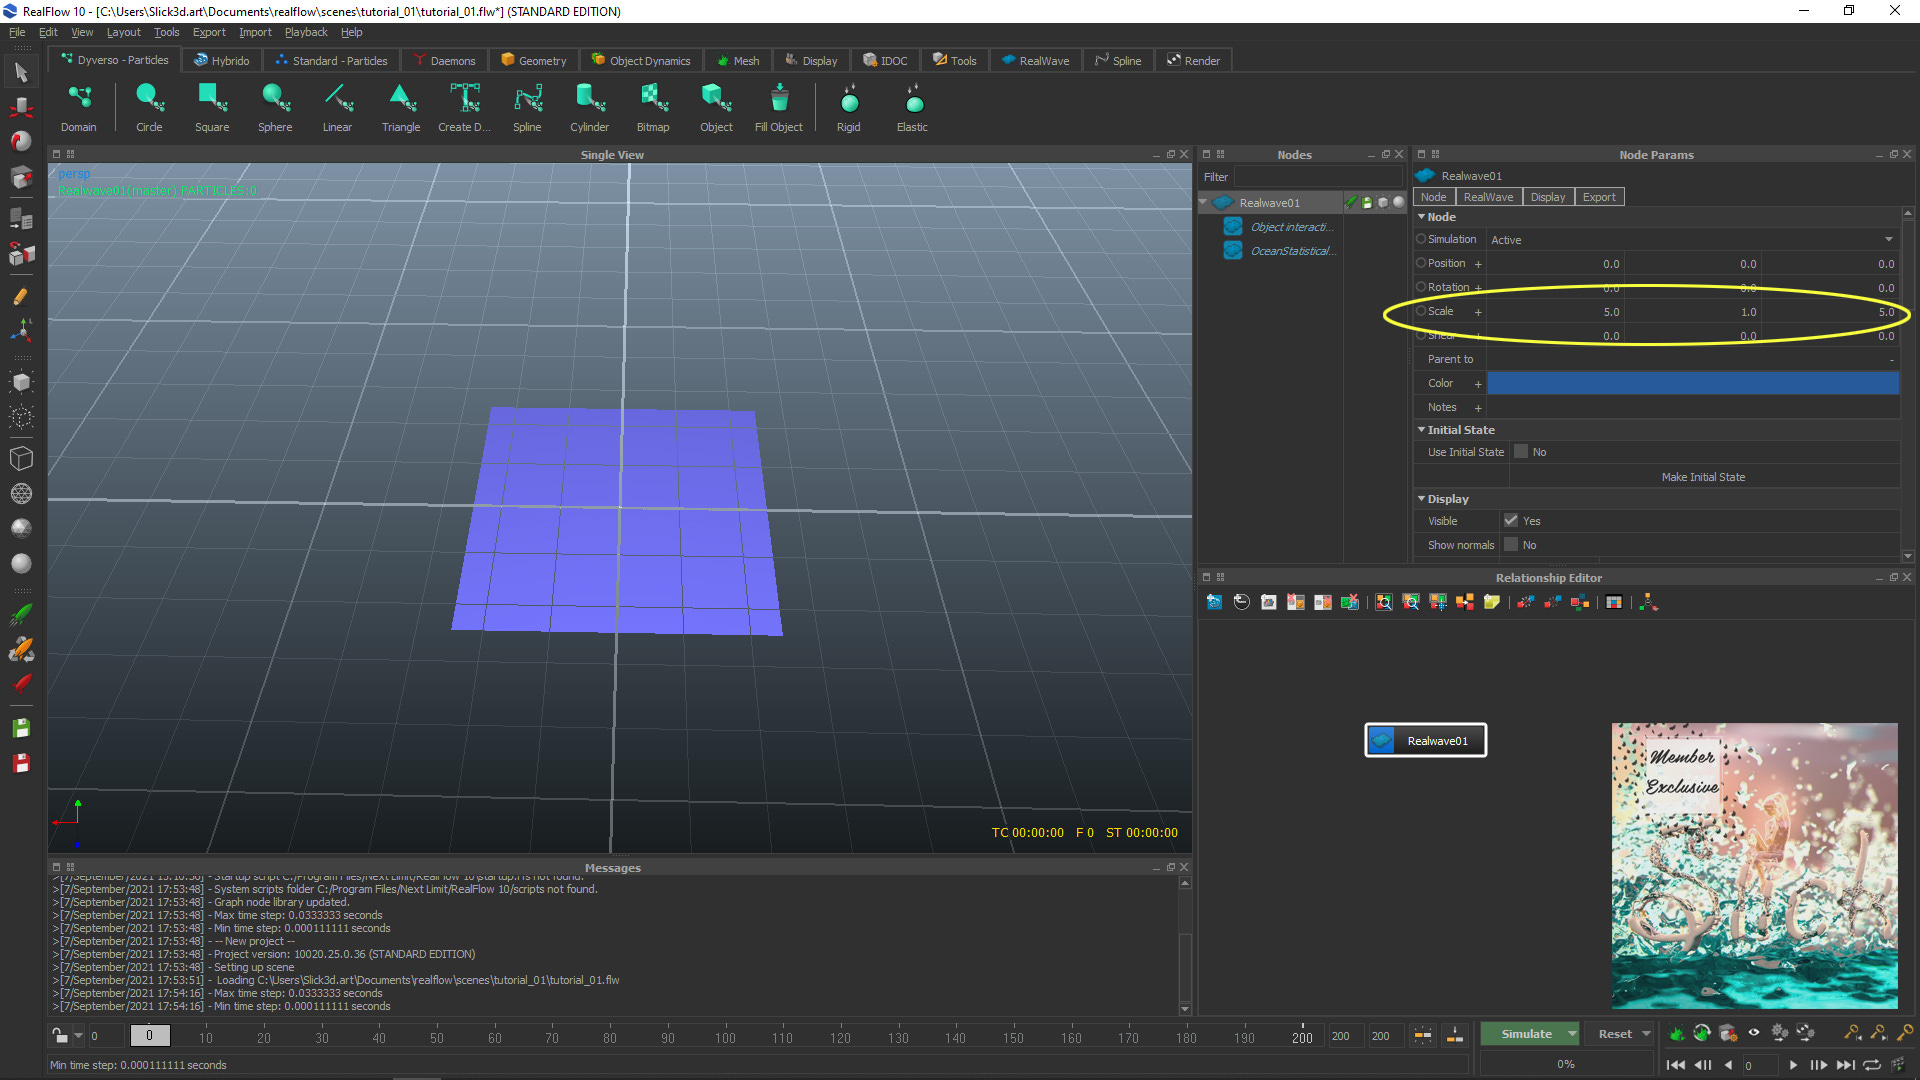


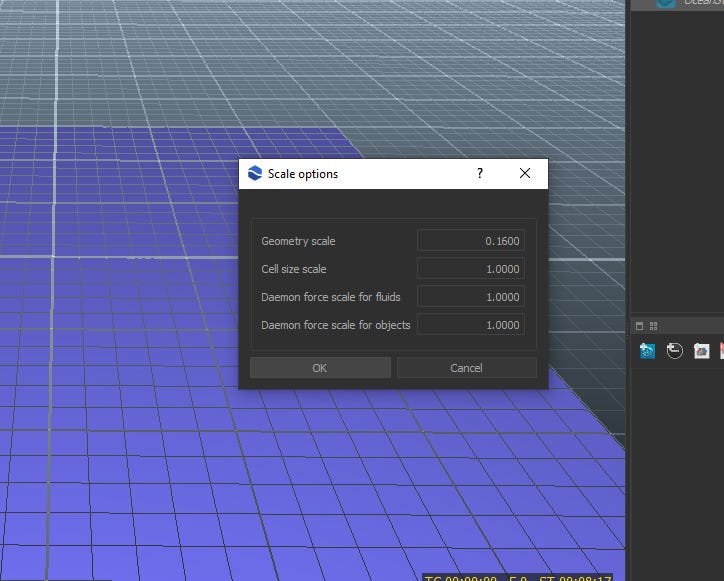
Another aspect is the geometry scale multiplier (that will be covered in a lot more detail in the next tutorial). I resized the mesh by a factor of 6. The mesh is bigger, therefore I’ll need much more high values to displace the mesh. To avoid to have to enter with crazy numbers, I decreased the geometry scale mulltiplier to 0.16 (division by 6), to compensate.

Hit the Simulate button and we’ve got not so much.

The displacement values must be tweaked. I only did modifications in the OceanStatisticalSpectrum01 subnode. For this tutorial, I altered the Time factor that is a kind of velocity multiplier for the whole scene. I also altered the Vertical scale, which is a very sensitive option (must be modified in very small increments or decrements); the Wind speed and the Choppiness, which is the waves sharpness factor.

In the video above, our Realflow simulation.
We need no more for this tutorial. Neither use a mesh node. We go directly to export our ocean. For this, we must use the Export Central.

Now, here’s the thing: we must export a surface deformation alembic cache. No other cache format will be useful. We find this option in the Realwave rollout. After checked it, we hit Done.

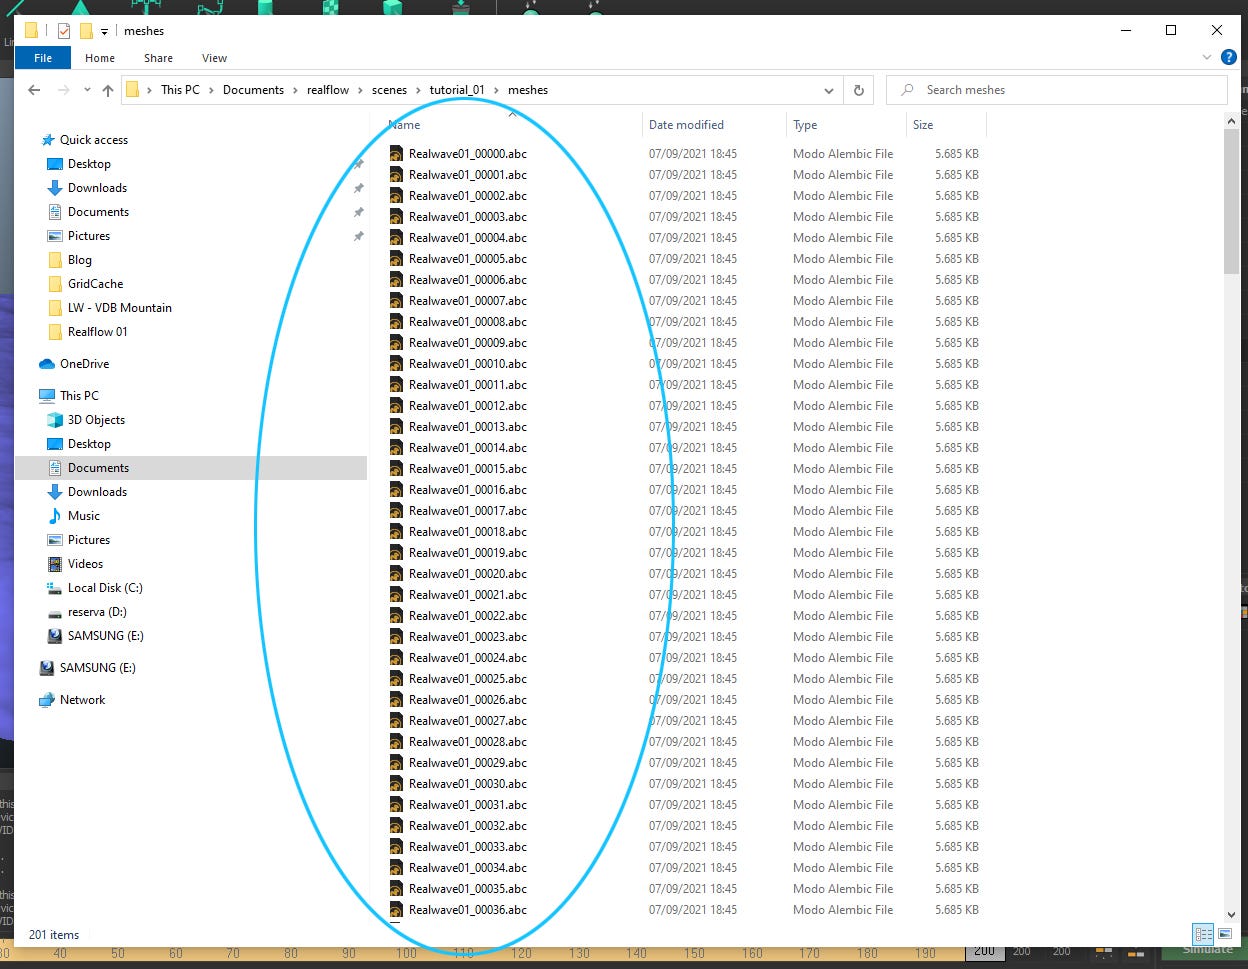
Realflow will save an alembic file for each frame in the meshes folder of the project structure.
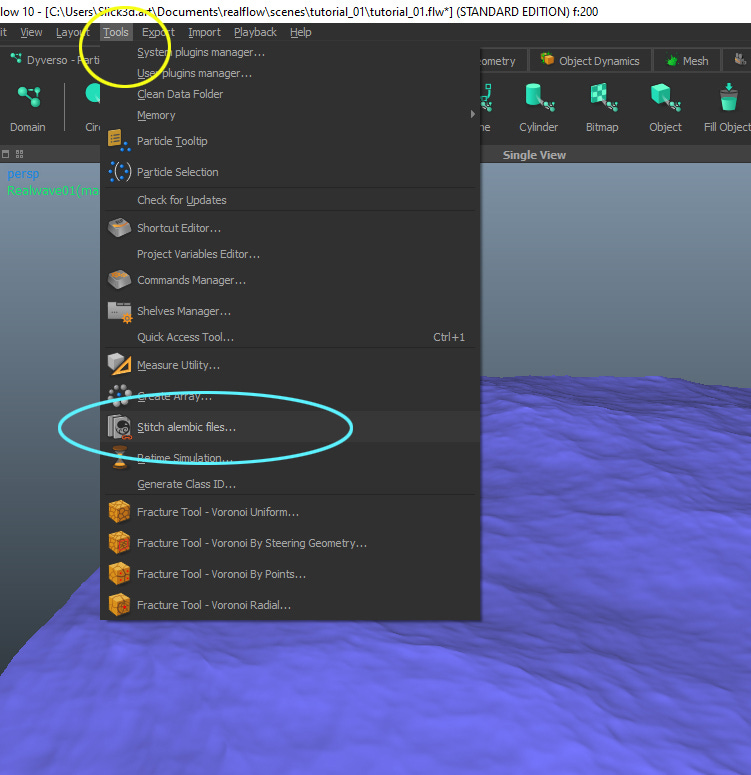
We can make this a lot better. How about to have all animation in one single alembic file? Realflow provides a tool to do exactly this: Stitch alembic files.
In the Sticher Tool window, click on Add files and select all alembic files.

Then, choose an output file name and click on Stitch to begin the process.


Now we have only one single file cache to be loaded in Lightwave. Note that the single alembic file is much more small than the size of the split files together.

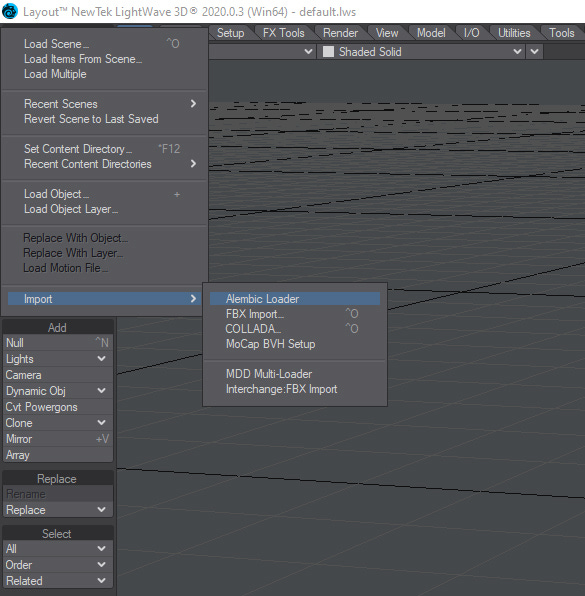
In Lightwave
It’s time to import the alembic cache into Lightwave. It’s important not forget to change the scale to meters.

But… Oops!


We can make the mesh double sided though…

We can see that the animation is ok.
Actually, the flipped normals aren’t a problem. We won’t use this mesh directly. I’ll disable it for rendering and hide it from view.

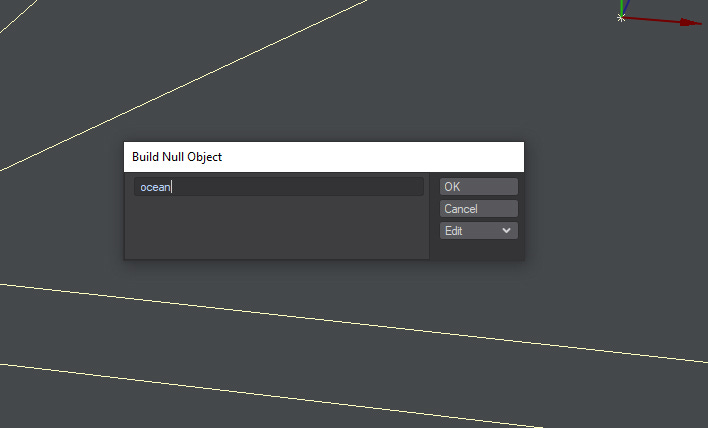
I’ll create a Null and called it ocean.
Next, we add an OpenVDB Evaluator and…
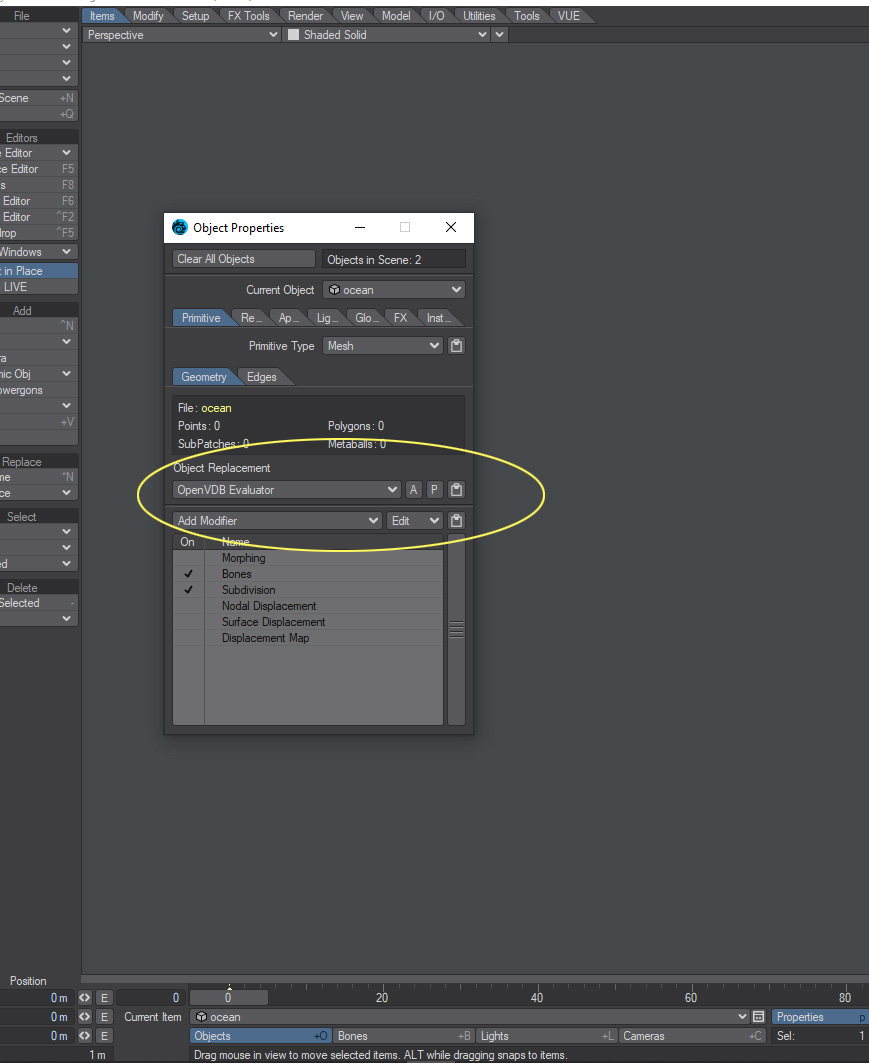
Yes! here is the trick. Here is the new world open to Lightwave 3D with the introduction of OpenVDB in Lightwave 2019. The alembic cache will drive the OpenVDB SDF (Level Set) deformation. Actually, this is the same process that the mesher node do in Realflow, but we are now able to do this directly inside Lightwave. Therefore, importing a surface deformation alembic cache and using the OpenVDB Toolkit as a mesher, we have a straight workflow between Lightwave and Realflow. No need of the Realflow connection plugin anymore. No need of OBJ sequence. Easy to do the shading now. Realflow back to Lightwave wokflow thanks to OpenVDB.

Continuing, Mesh to Volume node to create the Level Set. We have to be careful with the Voxel Size. Bigger geometry requires greater voxel size: a small voxel size will create millions of voxels that can overload the memory and crash the computer. All depends of the scene and computer hardware power. Here a set up a voxel size of 0.5 (later, I changed to 0.4). Probably, you’ll see nothing. This could be a problem related to the voxel size, but in our case, it’s suffice to use a filter node set up to Dilate. Again, the voxel offset is a scene dependent parameter. Here, a voxel offset value of 1.0 worked for me.


Above: Lightwave’s animation preview.
Below: a test render.
In a near future I’ll publish a tutorial on how to set up foam and export textures from Realflow. Let me know what kind of tutorial you are expecting. Any requests, leave it in the comments. Your feedback is fundamental. That’s all, folks.