
Lightwave 3D OpenVDB Morph Effect.
A very cool effect, very simple to do using the Lightwave 3D OpenVDB Toolkit.

Before we begin: This tutorial is too long for the e-mail format. Probably, the received e-mail will be clipped. If you’ll follow this tutorial through the e-mail, do not forget to click on View entire message at the end of the e-mail.

The alternative is to read the tutorial on the Substack web site: https://slick3d.substack.com/welcome
In Modeler.
You’ll need two different meshes to do the VDB morph effect. For this tutorial I have a woman and a crystal. My goal is to transform the crystal into a woman.


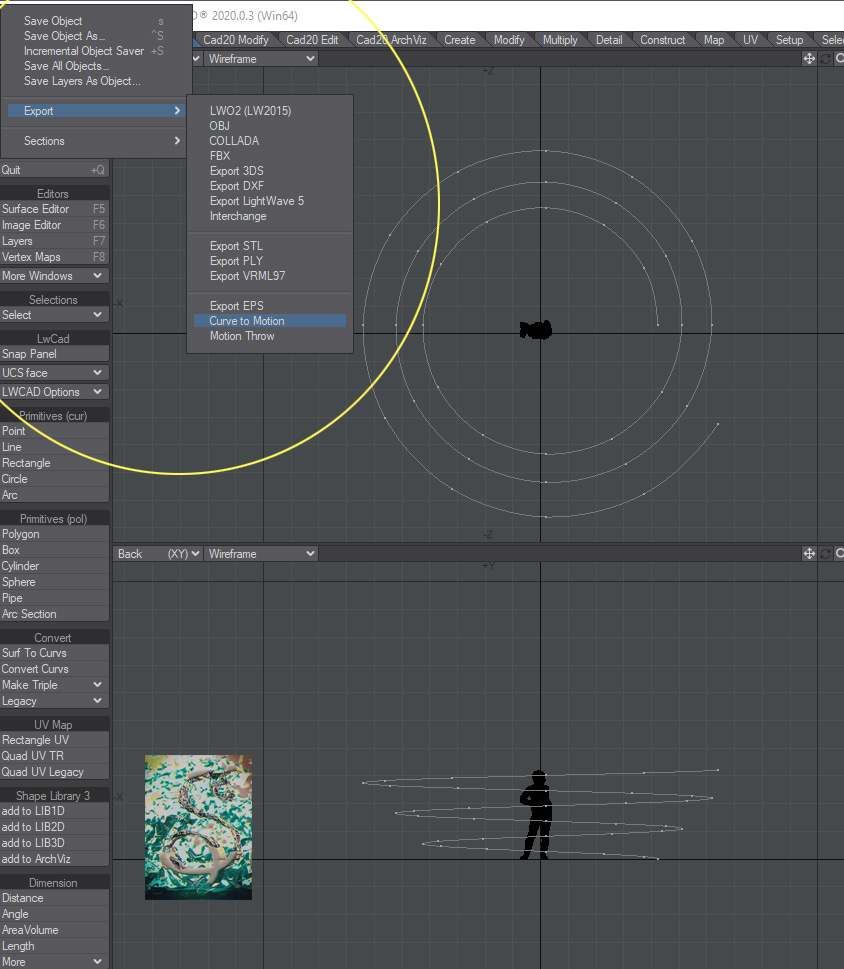
I matched the crystal with the woman size. Now, I go to the third layer to create a small box. I am not going to use it. This box is only to use the helix tool and build a spiral curve that is going to be the Camera motion path in Layout.


The most important parameters are the number of rotations and the helix height.


I resized the spring with the camera motion in mind, with care to match the top of the spring with the head of the model.

Inside the layer containing the curve, go to File > Save > Export > Curve to Motion, to export the curve as a motion path file ( .mot ).


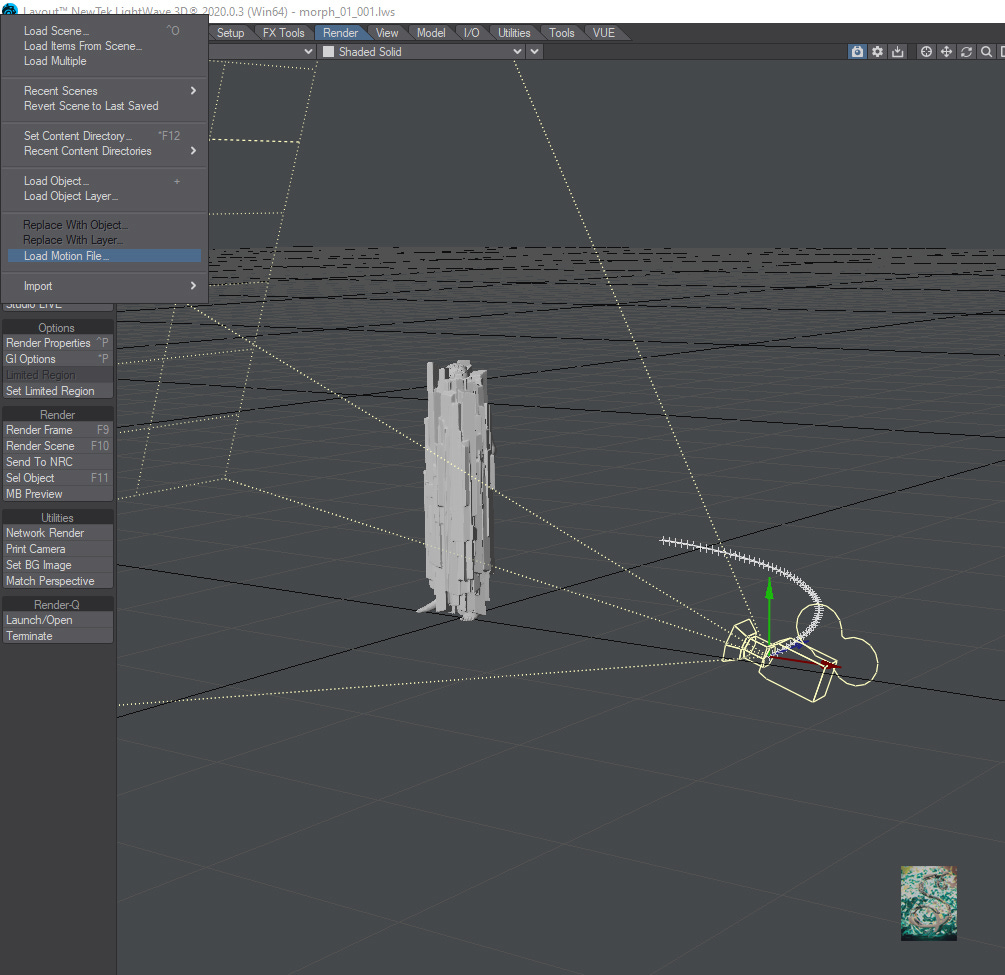
In Layout.
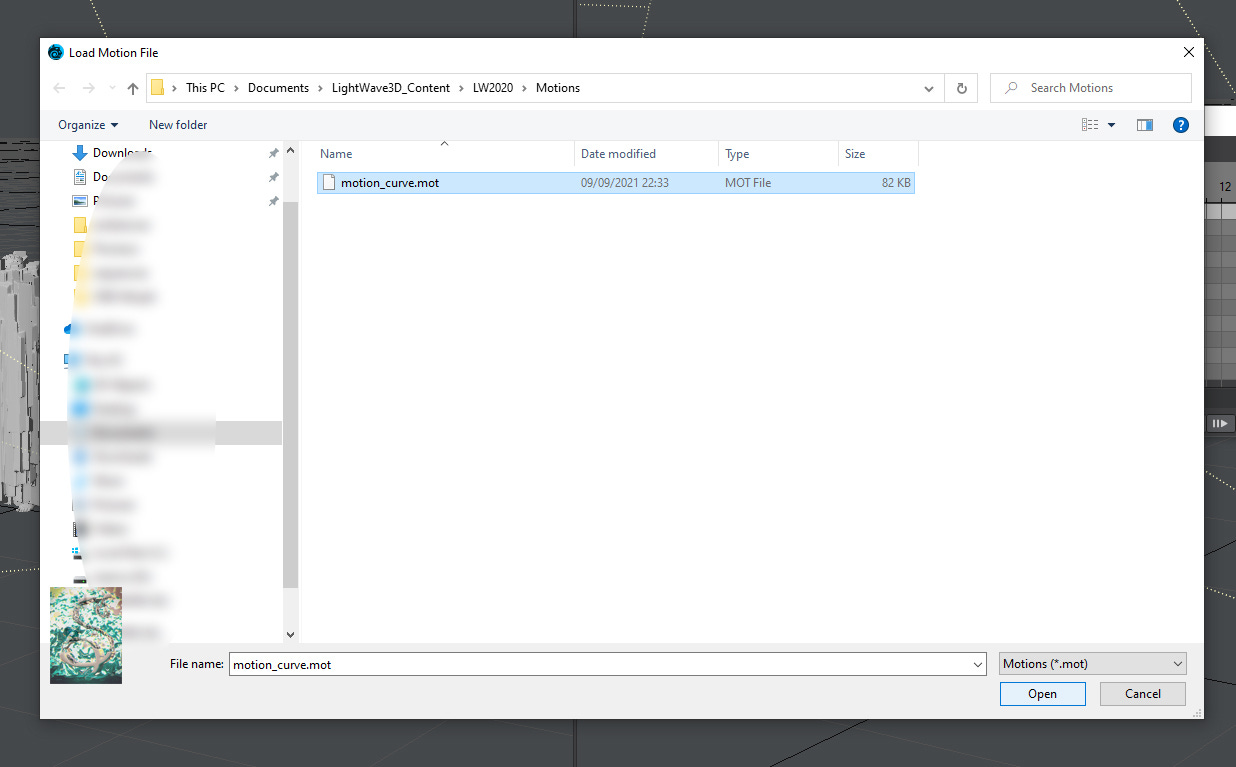
Set the timeline to 900 frames and select the camera. Define a X axis offset for the camera position. This should be balanced with the focal length. With the camera selected, go to File > Load Motion File and select the .mot file saved in Modeler. You’ll see the camera keyframes on the timeline.
I also created a null to be set as the camera target. I animated the null to have the expected camera frame and animated the focal length as well ( All this process takes time. Here is only a guide. You should set up your scene related to your project, of course.
Above: The null animation.

Above: The Camera motion.

The morph effect, by default, happens on the whole mesh at once. I’m looking for something more fancy. Then, I created a box with a height that matches the woman height and animated the top of the Box growing from below to top. This box is going to be the mask for the VDB Level Set. Therefore, the morph effect will occur from below to top.

Above: The Box animation was obtained by animating the scale value on the Y axis.
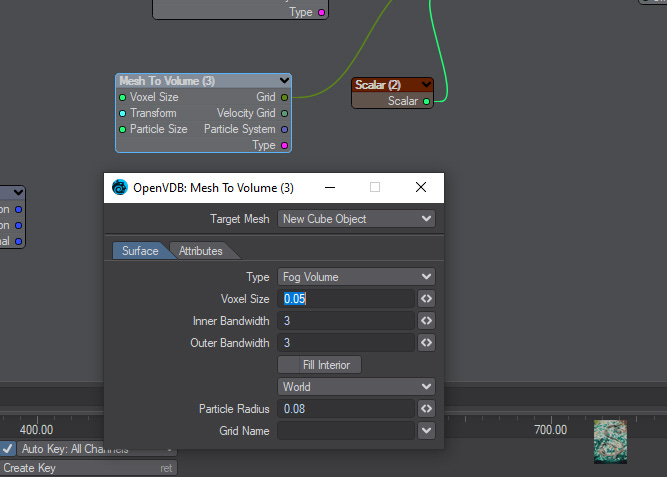
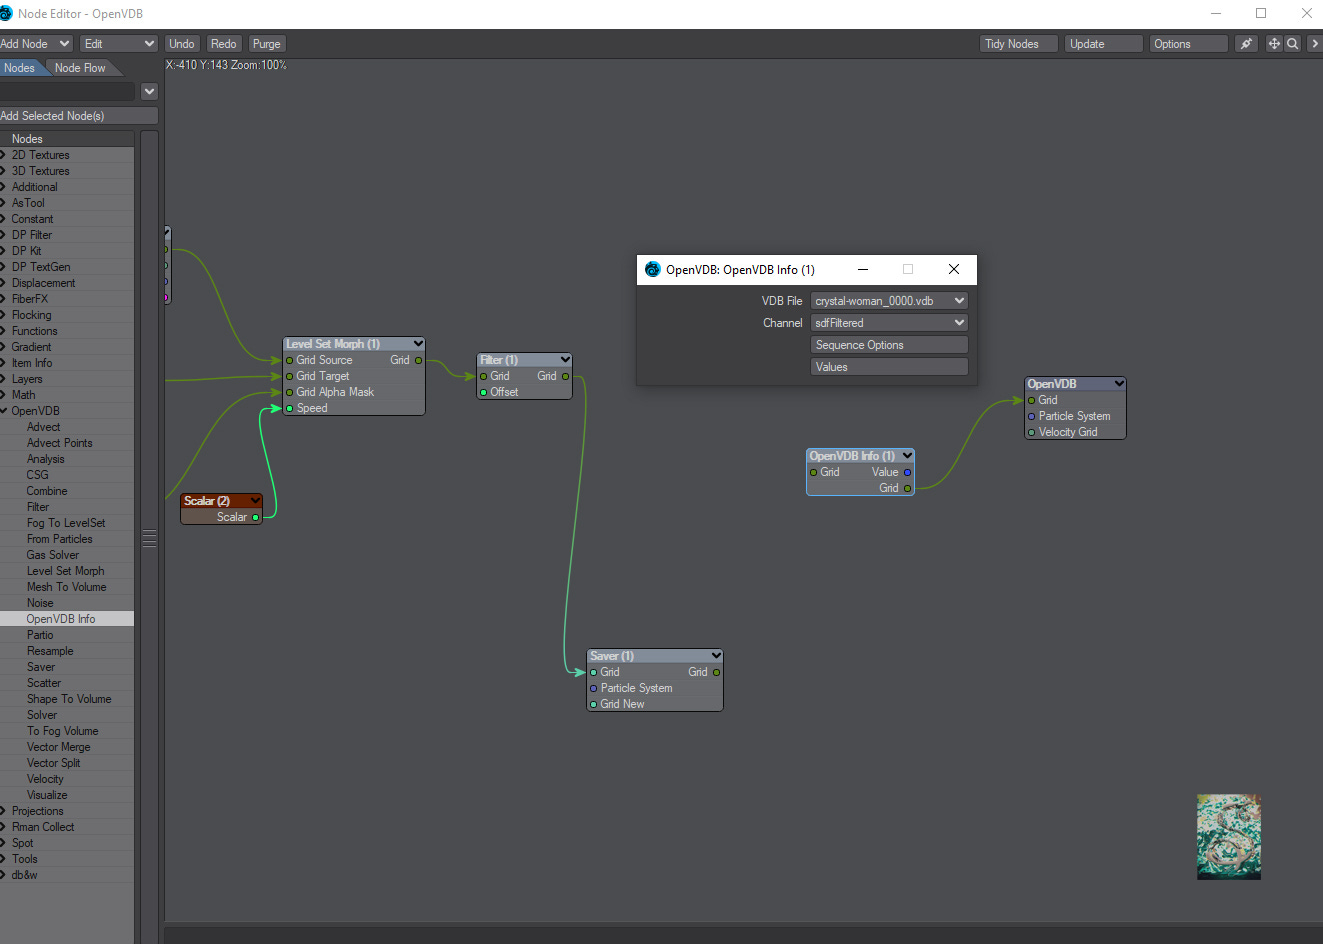
Next, I created a null called VolumeMorph and set the Object Replacement to OpenVDB Evaluator. Hit P to open up the node editor. The Level Set Morph node is the responsible for the morph effect. I begun to set the voxel size to 0.0031, but I recommend to start with a value like 0.05 or 0.1 to avoid sluggishness or a system crash. Of course, the voxel size must be set related to the size of the object. The first Mesh to Volume node target to the crystal, which is the source. The second Mesh to Volume node uses the woman mesh. Of course, both must be set as Level Set. The third one target to the box that is used as mask, to do the morph animation from below to the top. This one I left as Fog Volume.
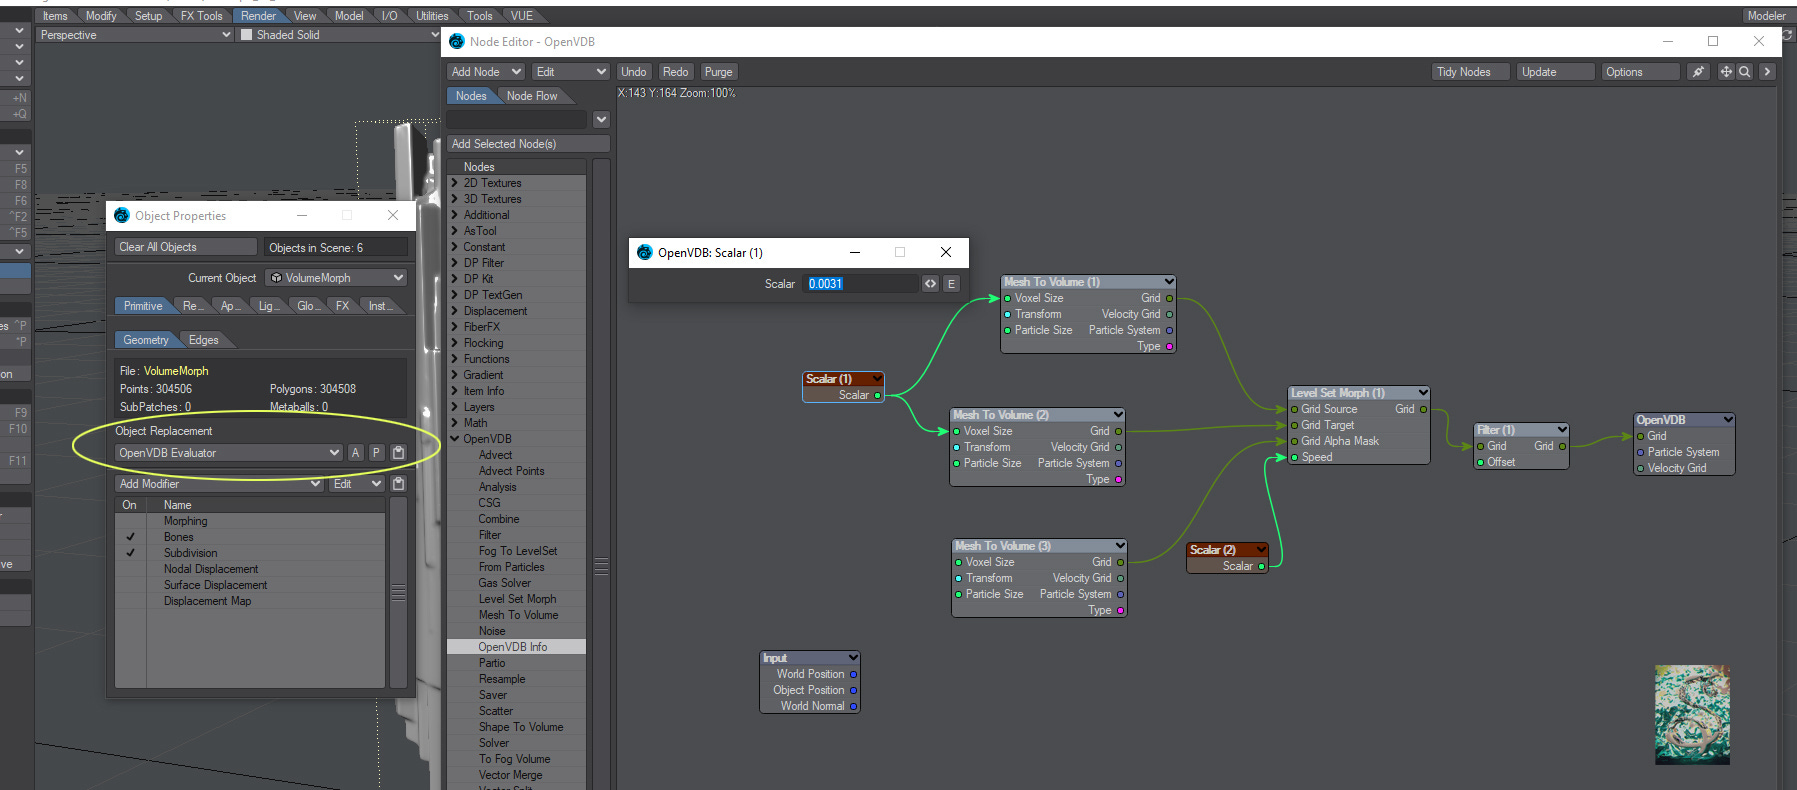
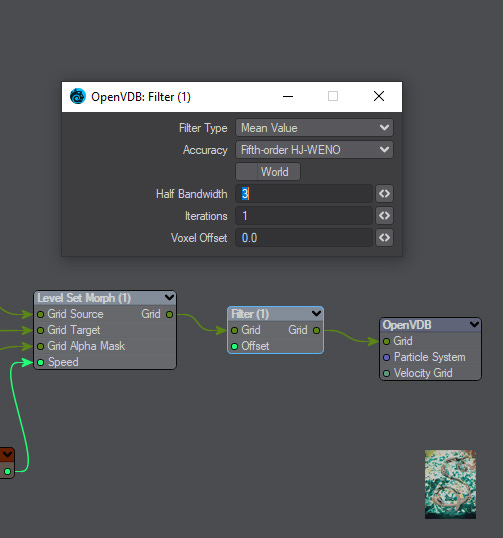
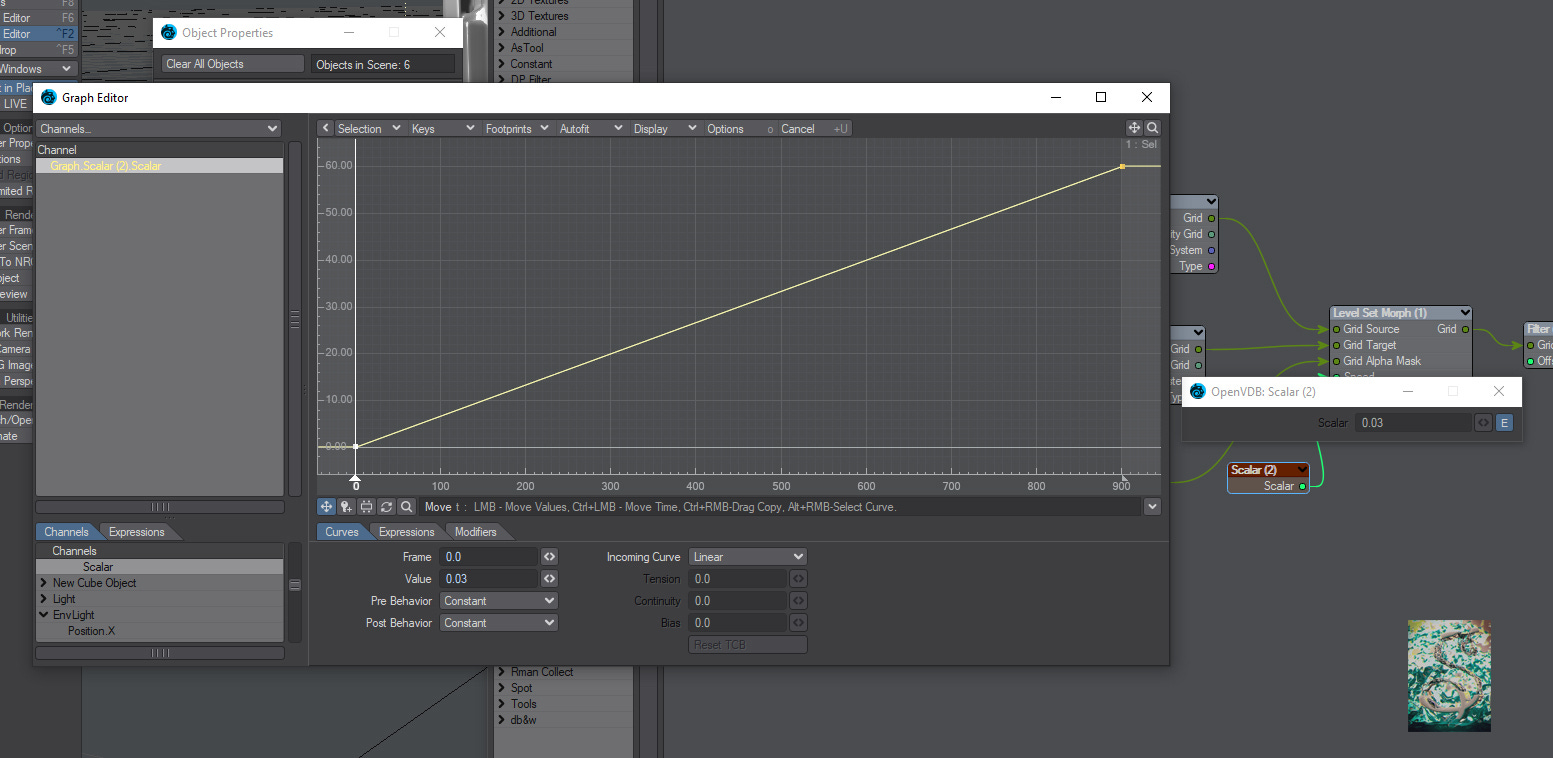
The Filter node was set to Mean Value, to smooth the Level Set a little bit. Lastly, the Scalar node connected to the Speed uses an envelope that sets 0.03 as the value at frame 0 and 60.0 at frame 900. The Speed parameter controls the velocity of the transformation.
Above: In this first test, I used a voxel size of 0.25. I recommend to use high values in the beginning to work faster.
Below: In the third test I achieved the desired result.
After finished the animation setup, cache the vdb sequence. All flipbooks above were made after I had cached the VDB morph animation. If you not do the caching, you’ll have to have a very powerful computer to avoid the playback sluggishness. The Saver node is used to cache a VDB static mesh or animation. For this tutorial, Save Type was set to sequence; Save Path defines the folder where the sequence will be saved, and File Name is the name of the file sequence.
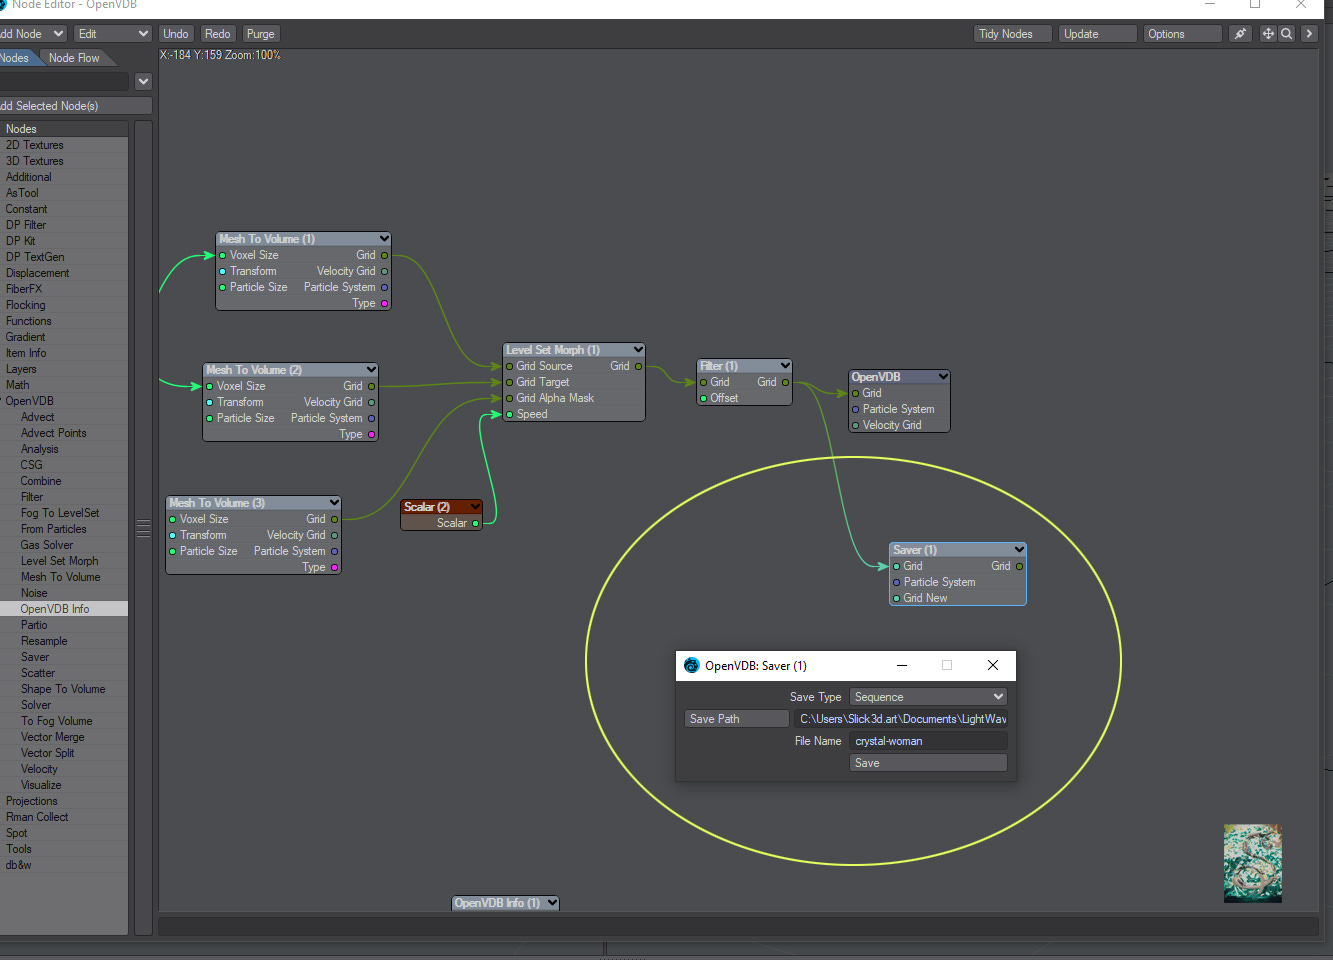
Use the OpenVDBInfo node to load the saved VDB sequence.
It’s not over my dear readers. Effects can be added on shading. For this tutorial, I’ll only do a simple shading: a dielectric material for the crystal, and a conductor material for the woman. The Material Mixer node is used to change the material applied through the length of the animation, in our case, from the dielectric material to the conductor material. The Alpha slot is used to control the velocity of the material switching.
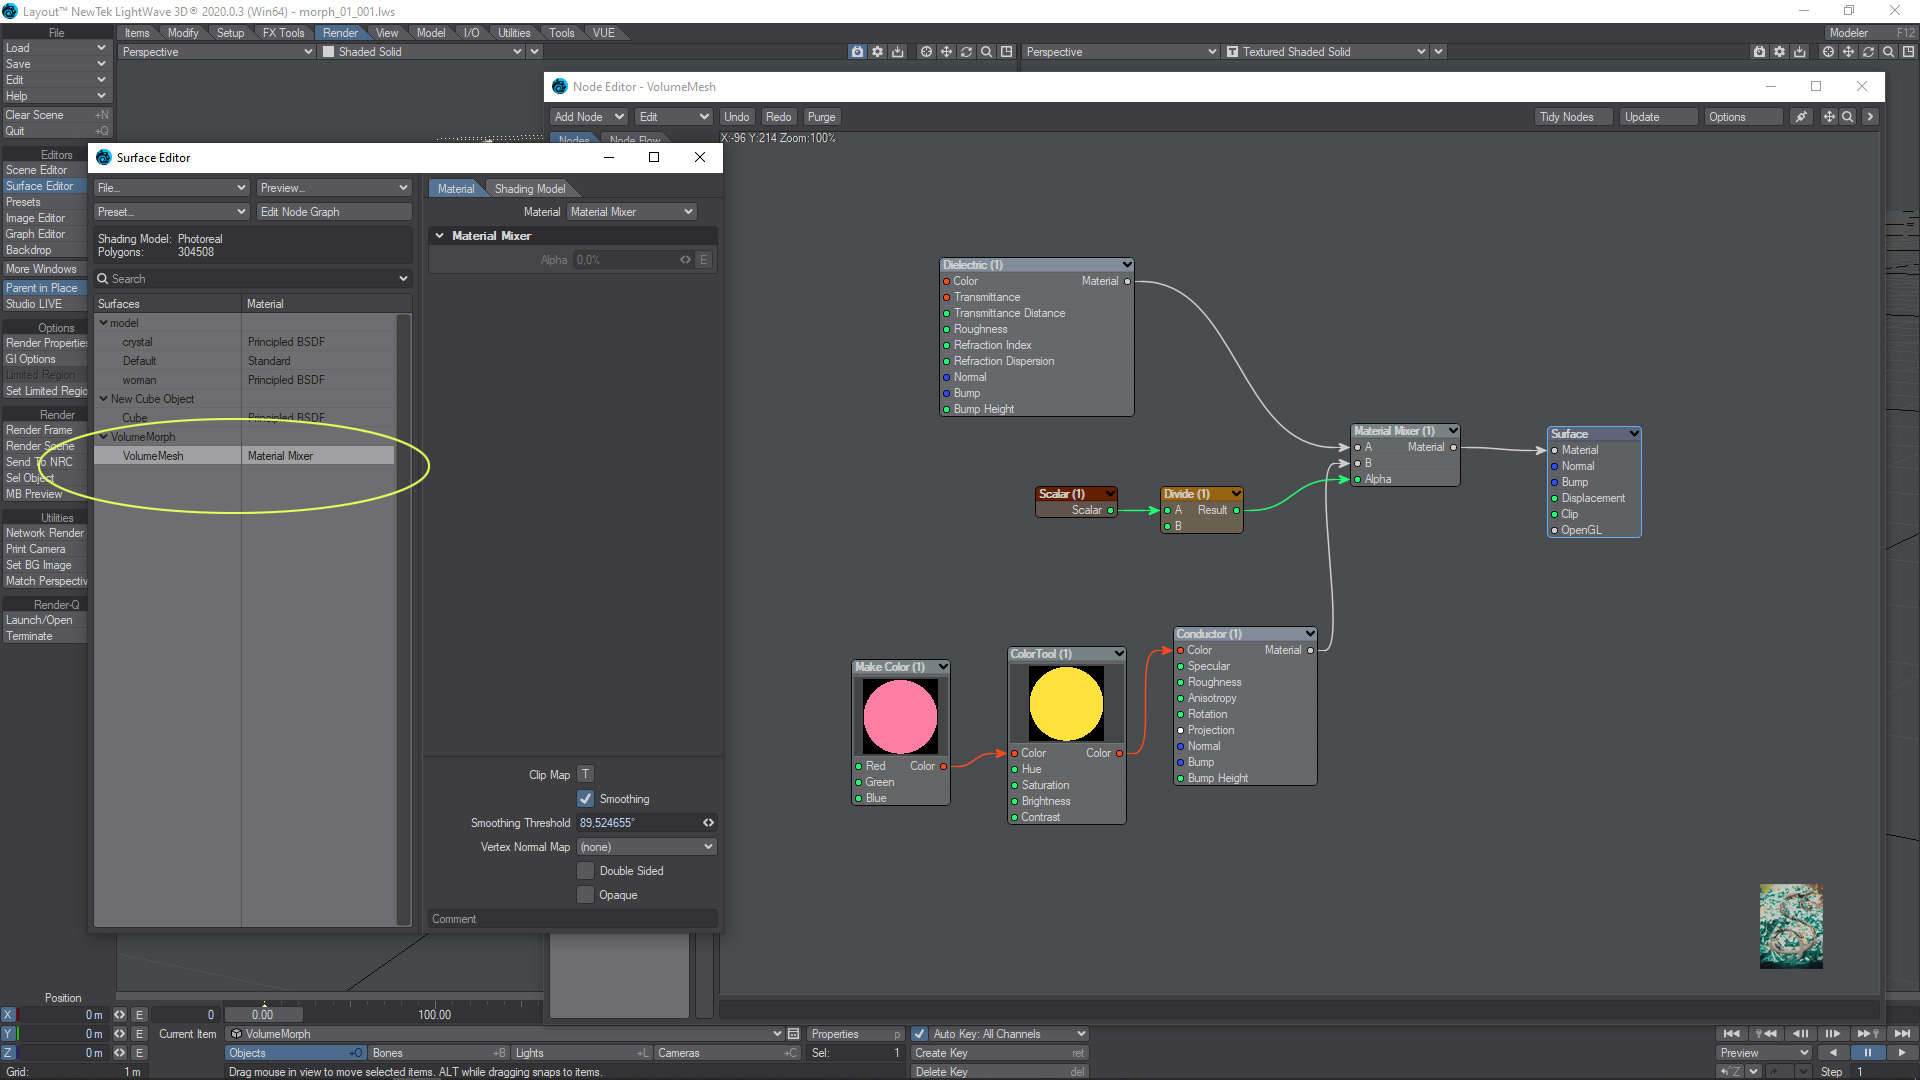
I copied and pasted the same Scalar node that was connected to the Speed slot of the Level Set Morph node. I divided for 36 to better match the animation.
And this is the final result:
That’s all folks. I hope you enjoyed.
Slick3d.art, a space of artistic celebration and artistic knowledge sharing: Only our best!
Do you want more?
Every month, I’ll publish tutorials related to the major 3D softwares in use. Subscribe to the free letter to receive free tutorials in your mailbox. To have access to paid tutorials, you must choose a paid subscription plan. A basic montly subscription will give to you access to all paid tutorials published for a small fee. Both, free or paid subscriptions will help me to maintain this site alive.