Blender 3D New Hair System to Lightwave 3D FiberFX Workflow
In this tutorial I'll show you how to convert Blender's 3D new hair system to Lightwave 3D FiberFx. For this, I am using the Einar's demo file that can be downloaded here. Also, you can become more familiar with Blender's new hair system features by watching the developer's video here.
Blender's 3D new hair system cannot be exported directly as curves like 3D artists are use to do with the classic hair particle system. To be able to export the new hair system curves to another software, the artist must select each created hair bundle (which is a geometry nodes assembly) and switch to sculpt mode. Then, inside the Curves menu, there is an option to Convert to Particle System. This will convert the curves to the Blender's classic particle system that can be exported as alembic cache or usd, for example. By the way, in doing so, the artist can add modifications using the particle system hair options, combining them with the geometry nodes setup.
At this point, the artist will be able to render the hair using another render engine instead of Cycles, because, now, the artist has the classic Blender 3D particle system, which is recognizable by third party render engines as Redshift, Renderman or Octane, for example. Also, it is easy to export to other render engines as Clarisse or Guerilla Render as alembic cache or usd bundle. However, to export it to Lightwave 3D, it is a completely different story.
Lightwave 3D does not recognize the curves in an alembic cache or fbx, and doesn't have support for usd either. If the artist try to export it, in the current state showed in this tutorial, using an obj or any other format, Lightwave still wouldn't be able to read the curves. To be able to use them in Lightwave 3D, the artist will need to convert all the created particle system to mesh.
I recommend to organize the scene before exporting. This will easy and reduce the necessary work to be done in Lightwave 3D.
The geometry needs to be exported as an OBJ file. Note that the option curves as NURBS must be ticked on.
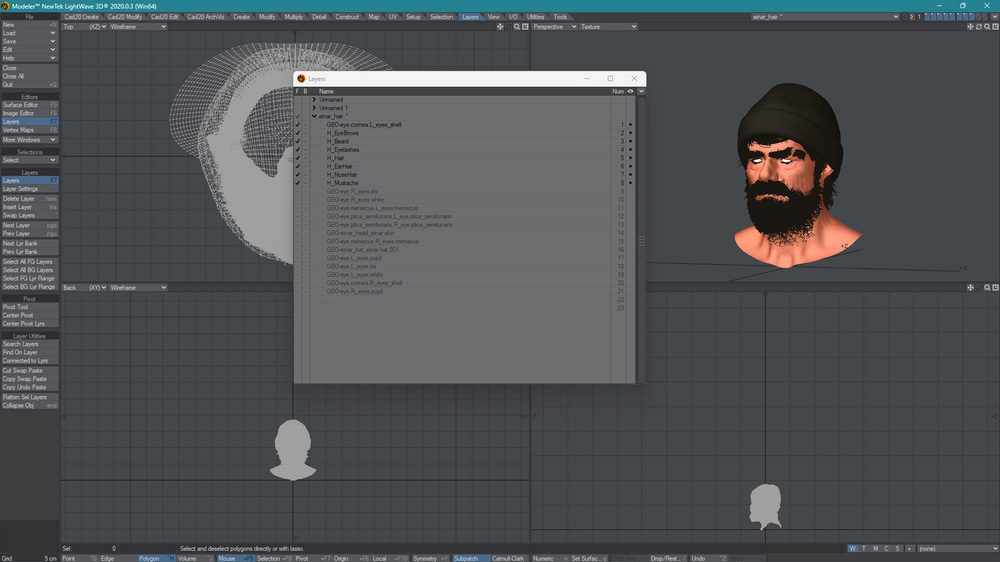
Inside Lightwave 3D Modeler, make sure that, before importing the file, the option OBJ One Layer is unchecked in the OBJ tab at General Options. This will load each mesh in a separated layer.
Note that I renamed the layers to identify them better in Lightwave 3D Layout.
Now, the artist have to convert each hair layer to strands, to be recognized by the FiberFx system. This is easily done by selecting the hair layer and go into the Setup tab and clicking on the Strand Maker.
Then, we have the file ready to be loaded in Lightwave 3D Layout.
Inside Lightwave 3D Layout, it is time to prepare the scene for rendering. First, I have hidden all geometry that was need to be hidden. After that, it is time to activate the FiberFx plugin for each strand bundle. Of course, the artist can make any desired modifications using the FiberFx options.
I highly recommend to use the AFC Hair Shader. It is, by far, the fastest shader to render hair in Lightwave 3D. Below, I show you one of the shading networks that I created for the final render:
And here is the final render for this tutorial. The ability to export Blender's 3D new hair system is a great addition to Lightwave 3D artists to do hair grooming.
One last thing you should know:
Slick3d.art was selected as one of the Top 20 3D Art Blogs on the web by FeedSpot. It is a great victory to me. It is a huge effort in very hard times. Besides, Slick3d.art encompasses my love for design and writing that started in my teen years. I am very grateful for the recognition that was a total surprise. Click here to go to FeedSpot Top 20 list or click on the image down below.


